Followers

Showing posts with label Halloween. Show all posts

Thursday, October 26, 2023

Fun Halloween Mixed Media Collage

Hello my crafty friends, 

Hope you are having a great day. Today I have a fun mixed media project to share with you. I used the Mixed Media Kit to create a Halloween Collage. I also have a process tutorial for you to view so you can craft along with me or use it as inspiration. I really like how this turned out, I can definitely see me adding this to a center of a wreath or place it up on the mantle as a Halloween decoration. 

Here is the video for you to view. 


To begin out project you will need the Mixed Media Kit shown below and another items you have in your stash. I added in some die cuts that I received from a swap, you will see those down below. I also added some clear gesso to the canvas and the wooden butterfly before applying my distress stains & crayons. 

While the canvas and butterfly were drying I cut out the images from the rice paper I wanted use. 


Once I cut out the images I spritz water on the back and gently tear away any excess paper from the image. This gives the image that nice torn feathery look on the ends. If you want you can ink the edges after your done tearing. 


Next I brought over the canvas and sprayed distress stains around the canvas. I would a little and blot with a paper towel and spray the next color, blot and so on until I had the canvas the way I wanted it look. 


Once I finished the canvas I set aside to dry for a bit. 


Next I started on the butterfly. For this I used the TH Distress Crayons, these are so fun to play with. I used all three colors to color around the butterfly and used a paper towel and my fingers to smooth out the colors. 


Once I finished I lightly spritzed on one of the distress stains, added a bit more green to the butterfly.  


Next I adhered the rice paper images down on the canvas using my glue. 


Once I had the images adhered down I added some die cuts from my stash like the tree, spider web and witch on the broom sticks. Then I adhered the butterfly down by adding glue to the back of the wooden butterfly. 


Now we are done. I just love how this all came together and it was so easy and fun. 


Thanks for joining me today. I hope you gained some inspiration from today's project and the all projects from the October Tres Jolie Kits. Don't forget to check us out on our social media I have all the links below for you. 

Happy Crafting Everyone, 
Debbie 


All the designers will be revealing their projects on the Tres Jolie blog all month long. Make sure you join us for tons of inspiration, including video and photo tutorials. Also make sure you check out our newest chipboard designs that were just added to the store.


Sunday, October 9, 2022

Halloween Octagon Treat Box

 Hi everyone, 

Are you getting ready for Halloween? I am starting my Halloween off by creating some treat boxes for my granddaughters. However, I still have to decorate the house, so I am bit behind. 

Today at International Art & Soul we getting ready for Halloween with a new challenge,  Ch. #144 use black & orange. Click on the link and see what other fabulous projects the design team created. 

For this challenge I used Jaded Blossoms Octagon Treat Box Die Set along with their cute Gnome Girl Die. The paper I used is from various scraps I had in my stash. 


Jaded Blossom Dies I used - 


Hope you get a chance to join this fun Ch. 144 - Black and Orange. 
Have a great day. 

Debbie DT


Tuesday, October 13, 2020

Happy Halloween with Retro Bows

 Hi all,

Sorry I am a little late posting my project for the new challenge at International Art & Soul

I was on a mini vacation with hubby and planned to have this post done before we returned but had to cut it short due to my father in-law not doing very well. So right now we are with family and will be here for a while. 

Our new challenge theme is - Halloween, so please join us and show us your fun and creative Halloween projects. 

For my project I created a few Halloween Bows with Retro Halloween Digital Paper. The digital paper is from (Click names to connect to store) Taylorcardmade4u, 9 Retro Digital Images &  Halloween Retro set 2 both of these are so awesome if you like the vintage Halloween images from the past. I also used some bag topper metal dies and Bow metal dies to create the bows, both of these dies are so easy to use. 

In creating these bows I used an old Halloween paper from Authentique for the bag toppers, bows and the background paper of the bows.  I decreased the size of Retro Halloween images so I could place them in the middle of each bow and fussy cut them. I them used glossy accents on top of each image to make it shiny. These were a give away prize for one lucky winner from my Halloween YouTube Hop I participated in a few weeks ago.


Challenges Entered:

Products Used:

Esculpido Bag Handle Dies 


6pcs/packs Bow metal cutting dies


Thank you for joining me today. I hope you get a chance to play along with for our fun Halloween Challenge at International Art & Soul. 

Happy Crafting
~Deb 


Sunday, August 23, 2020

Pastelloween Candle & Candle Holder

 Hi,

Yep, it's my second post. (LOL)   I wanted to share Day 2 of the Pastelloween Collab with Scrappassion01.  

For today's project I used a technique that requires some tissue paper, inks, heat gun, and a candle.  The ink I used is DewDrop Brilliance inks. They work wonderfully but you do have to be careful because they smear a bit as they are a pigment ink. 

Here is photo and down below I have the link with video of the short tutorial I created for you. 


I just love how it turned out and the candle holder I found at a garage sale for .50 cents. 😊  
Here is the link and video tutorial
https://youtu.be/-UhS7F17gX0
I hope you enjoy the video and I hope you join in the fun. 

Challenges entered:


Pastelloween SPOOKY Banner

 Hi everyone, 

I am a bit behind posting some photos of a Pastelloween Collab I am participating in on YouTube. 

The hostess is Scrappassion01, she had invited me to take part. There are 15 of us participating all together. Down below I will list the links for you so if you want to see all the amazing creations you can stop by and leave some love. 

For this Pastelloween Collab my goal is to buy as little as possible and really try to use items I already have in my stash.  For the first day I created a cute Pastelloween Banner using my  I didn't have any Pastelloween paper but I was lucky to find some that was a digital paper on Etsy. I bought the pack and printed out my printer. I also wanted to large letters and didn't have any so I bought a 4 from Walmart they are a nice size and very heavy. They were perfect for the banner, all the rest of the items I already had, skulls, wooden spider web, extra papers and eyelets and purple twine.


I hope you enjoy the video and come join us because there are prizes to win too. 

Here is the link to the Video and short Tutorial for you viewing. 

https://youtu.be/JP-vhQdClWA


Sunday, October 13, 2019

OOOO, Halloween Treat Boxes

Good Day Y'all,

Oh, gosh today I am so excited to share with y'all super easy treat boxes for your little ghouls & goblins. (I also will posting a tutorial here later. Okay.)

First, I want to invite you over to International Art & Soul for our Halloween Challenge #69, just click on the link and you will be there in seconds. The team came up with some really cute projects for this Halloween Challenge, you will be inspired for sure.

For my project I was inspired by a Cauldron Treat Box I saw on Youtube, her yt channel name is - The Scrappy Bookworm1. So I wanted to give it a try, I really liked hers but I didn't want to copy her exactly and wanted to do my own thing, so I tried and I tried and I tried, LOL, until I finally got what I wanted. You will see below the two cauldron's I created both are really different. After I finished those, I just couldn't help myself, LOL,  I started thinking this little treat box would look so cute with little ghosts and pumpkins on placed on the box.  So below I will show all the Treat Boxes I came up with so far. LOL  I hope you enjoy and get a chance to create some and join us over at
IAAS - Challenge #69 - Halloween.

For the Cauldron Treat Box I used the Recollections Stamp & Die Set - Halloween. I used Googlie eyes from the Dollar Tree and the little pumpkin I fussy cut from a scrap paper in my stash. The little smoke inside the Cauldron is actully Stetchly Spider WEB stuff you get at the store. I cut a piece off and used my Tim Holtz inks for color it green.  
The Cauldron and Pumpkin are created from a circle die - Elizabeth Crafts Stitched Circles Die. The Pumpkin is super easy peasy, used an old green tag from stash I cut for the stem, the nose is a little wonky, (lol) and the mouth is from a scalloped punch, I tied a little burlap string to give it a little more interesting look. The paper is Holographic paper that I bought years ago from Create and Craft. 


This Cauldron I created with 1 inch,  1 1/4 inch, and 5/8 inch punches. Googlie eyes, and Black Glitter paper I had in stash from HL. 

 The little ghosts took me a bit cause I had to draw them by hand and I am not a good at drawing. My skills are more like stick people. (LOL)  But once I had this image I made a template. :D 
I used my Create and Craft glitter paper I bought years ago, added a paper bow I had in my stash with a purple gem, googlie eyes are from Dollar Tree and the mouth is a 1/4 of a scallop punch. I added the word BOO from a embellie swap I did last year and the spider is die cut from Recollections.
The bottom one is the same but just a bit different. 


Below are Challenges I entered:

Thanks for joining me today. Hope you all join us for some fun. 


Sunday, October 16, 2016

A Little Happy Witch

Hello all,

Today at One Stitch At A Time we are having a new challenge - Anything Goes with Halloween Colours. Yep, you heard right, Halloween Colours. You can upload any project as long as it has Halloween Colours.
For this challenge I used KT Trick or Treat by IKEsART found at Stitchybear Stamps Digi Outlet.
So here is my POP-UP Card

For the front of the card I used I used some papers from my stash
and used Blue Ferns Chipboard webs and black cat. I used BoBunny Black
Gesso for the spider web and black cat. 

When you lift up the card the little image KT trick or treat pops up with the 
pumpkin and little ghost by her side. 
For my background I used some Halloween design papers in my 
stash and fussy cut some bats and cut out Happy Halloween 
from my cricut. 

My little witch image she I used my copics and. I thought some 
bright orange and yellow hair would be fun. I printed the image on a sheet of 
Authentique's Mysterious design paper, fussy cut her little dress
 and colored purple with my copics. 
Our Sponsor
Our Prize


Thank you all for stopping by, hope you all were inspired to upload and join our Halloween challenge. Stop by our challenge to see what my teamies created you will get some fantastic inspiration. 
Have a great Day 
and 
Happy Crafting
Hugs, 
Deborah

Sunday, October 9, 2016

Halloween In Pink

 Hi Ya!!!

How's your weekend going? Mine is going pretty good. It was so lovely today in Texas just beautiful. I hope you all are okay where ever you are and to all my crafty friends in Florida I am praying for you all.  
Today I am up at Really Reasonable Ribbon, yep, I created another Halloween card but in different colors. I thought this would be a fun and challenging creation.  Especially when I saw a few challenges that wanted a pink Halloween card or project. I had to take on the challenge. :D 
For my card I used one of the pink diamond satin ribbons from the Pretty Pink Diamond Satin Assortment and the spider web black satin ribbon


For this card I used spiderweb embossing folder. I embossed the Witch Hat from Graphic 45 stamp Happy Haunting in pink and embossed the the little stars in the sky. I fussy cut the little bats that are from another stamp in my stash and placed them around the Pink Witch Hat image. I created a beautiful pink bow using the pink diamond satin ribbon with the Bow it All V3.0 Tool. I also used the rest of my Spider web ribbon it's behind the my image. I also used an edge punch for the bottom layer of my card. 

Supplies:
Reasonable Ribbons - spider web black satin ribbon and  Pretty Pink Diamond Satin Assortment
Stamps - Graphic 45 stamp - Happy Haunting
Paper - Recollections - Midnight Magic
Inks - Distress inks picked raspberry; black memento ink; distress inks - faded jeans & chipped sapphire; copics
Accessories - Spider embossing folder, Fleur De Lis edge punch; embossing powerder clear and pink; crystal stickles; 

Challenges entered:
Simon Says: Halloween Inspiration; Wednesday Challenge Blog
Crafty Ribbons Challenge: Challenge #170 Halloween Colours
Sisterhood of Snarky Stampers: SOSS #69 - P is for Pink Halloween
Crafty Gals Corner: Challenge #92 - Punches/Die Cuts
Crafty Creations Challenge: #325 Halloween
Crafty By Designs: October Anything Goes
Mojo Mondays - The blog mojo mondays #469 Contest

Thank you so much for stopping by today I really appreciate you all. I would like to invite you over to Really Reasonable ribbons to get more inspiration from my teamies and to join our fun Halloween Challenge follow the link -  Really Reasonable Ribbons Challenge Halloween. 


Have a great weekend
Hugs
Deborah xxx

Friday, October 7, 2016

Happy Halloween


Hi Ya!!!

I hope you all had a wonderful week. Today is a new challenge over at Really Reasonable Ribbons our theme - Halloween!! Yep, so you get to share all your spooky ghoulish creations with us, How FUN IS THAT!! :D

So of course I used the Too Cute To Spook ribbon assortment for the Halloween Tag I created. I just couldn't help it. I used the spider web black satin ribbon with the beautiful double faced satin tangerine.   If you haven't got these awesome ribbons yet, you gotta get them. They are just beautiful and so great to use for your Halloween projects. I also used a TH Stamp and numbers along with Recollections Halloween paper and some die cuts.

 Such a fun tag for Halloween. I stapled the spider web ribbon on small stamped tag.
I embossed the stamped image with black embossing poweder and used
 TH inks around my image. I wanted to give it like a sunset type of look. 
And with spider webs on the stamp I had to use the spider web ribbon. Right??? 
I fussy cut the little sentiment on the top popped it up with 3D adhesives and I fussy 
cut the scary pumpkin on the bottom. The fence is a cut from my cricut. For my 
background I used Anna Griffith die spider web die cut and a spider from 
the collection. I added black stickles to the spider. 
I love how it all came together. 

Supplies:
Reasonable Ribbons - spider web black satin ribbon and double faced satin tangerine
Stamps - TH stamper Anonymous - x-ray collage  Halloween
Paper - TH paper ;Recollections Halloween paper; Ranger Manila tag; TH distress watercolor cardstock
Inks - Distress inks dried marigold, mustard seed
Accessories - Anna Griffith Dies - spider web and spider; Cricut image - fence w/crow; TH Ideaology - alpha-parts Ransom; black embossing powder and black stickels

Challenges entered:
Simon Says: Halloween Inspiration; Wednesday Challenge Blog
Crafty Ribbons Challenge: Challenge #170 Halloween Colours
Crafting With An Attitude: Challenge 20
Crafty Gals Corner: Challenge #92 - Punches/Die Cuts
Crafty Creations Challenge: #325 Halloween
Crafty By Designs: October Anything Goes

Thank you so much for stopping by today I really appreciate you all. Head on over to Really Reasonable Ribbons Challenge Halloween to join us for the Fun Halloween Challenge. You can also see what fun creations my teamies have for you.

Have a great weekend
Hugs
Deborah xxx

Thursday, September 29, 2016

Cute & Spooky


Hi all,

It's my turn to be up on Really Reasonable Ribbon Blog today. I am sharing the wonderful "Too Cute to Spoke Mix" from the Reasonable Ribbon shop. 
I made a cute little card with some Halloween paper I had in my stash from years ago. I am so glad I found this paper it's so cute I used a cut apart sheet and cut out the coffin. I just like the cute Wonky Squares on White Satin Ribbon looks great with this card. I also used the Bakers Twine Green in the black button. I also used the cute little Halloween Too Cute to Spook print on black grosgrain ribbon is adhered in the middle of the card.


Here is the inside of the card. So cute I thought this little card was perfect for this inside.
I used the 5/8" Gauze Print Satin Ribbon on the top of the cut apart card
and then used a black button with the Bakers Twine Green

Here is a close up of the bow I created using the 


Supplies:
Really Reasonable Ribbon - "Too Cute to Spoke Mix" from the Reasonable Ribbon shop.Bakers Twine Green
Paper - EchoPark - GhostTown; Little Yellow Bicycle - trick or treat; Imaginisce paper (no name)
Ink - TH Distress ink - Hickory Smoke
Accessories - Black buttons

Challenges Entered:
Monday Greeting Challenge - Anything Goes GCC092616
Classic Design Team Open Challenge Blog: 1st September 2916 Classic Design Team #06
Crafty Creations Challenges: #325 - Halloween
Creative Moments: Challenge 103 Anything Goes/2 Pattern Papers
Word Art Wednesday:Anything Goes - Challenge Weeks #250-251
The Crafty Addicts: Challenge #25 - Anything Goes/ Use Pattern Paper

Thank you for joining me today. I hope you were inspired to make a Halloween Card and stop by Really Reasonable Blog check out our Challenges. We still have one going and you have some time to join before the new one starts next week. And if you want any of these scrumptious ribbons head over to the Reasonable Ribbon Store.

Wish you all a great rest of your week and Thanks for stopping by.
Hugs, 
Deborah xxx

Tuesday, September 20, 2016

Too Cute To Spook Headband

Hello all,

I have something to share with you all today. I tried something new with ribbons from Really Reasonable Ribbons. I have been wanting make a headband for many many months but just a little nervous to do it. You know Bonnie, who is the owner of Reasonable Ribbons, she makes headbands all the time and they are just beautiful. Well I followed one of her videos and she makes so easy to create one of these fun headbands I had so much fun. Of course I need a little more practice but I thought for my first one it was pretty good. I made this headband for my granddaughter Reminie, she's been talking none stop about Halloween, being 2 years old this will be a fun time. I think she'll like the headband. :D

I used the wonderful Too Cute To Spook Mix it's the September Club of the Month Assortment.
So super fun!!
Monthly Ribbon Club, Domestic

 For the hairband I used three ribbons 

 Here is a front view of the headband. 
I just thought these ribbons looked good together 
and I really like the little black ribbon 
To cute to spook print is just the cutest Halloween ribbon ever!! :D 

 Here is the back of the headband it looks so cool. 
I am really please with how it turned out. 

A lovely sideview, you can see the little green spooky guy, 
there is a skull and the word Boo. 

 A topview of the headband showing the bow I created using the Bow It All V3.0 found at 
Reasonable Ribbon Store. You can also get the headbands at the Store too. 
Here is the link to Bonnie's Youtube video showing you how to make these fun headbands.

Supplies:
Accessories: Really Reasonable Ribbons - Too Cute To Spook Mix and the plastic headband 1/2 inch.

Challenges entered:

Thank you all for joining me today. I appreciate you taking the time to stop by and visit. Hope you all head over to the Really Reasonable Ribbons and check out the store and this months ribbon of the month  Too Cute To Spook Mix. Also don't forget we have a fun new challenge up so join in the fun. 

As Always Take Care 
Hugs, 
Deborah xxx

Tuesday, September 13, 2016

Purr-fect Ribbons for Halloween

Hi Everyone!!
Please join us today for the Really Reasonable Blog Hop!!

Whoot, Whoot!!
IT"S BLOG HOP DAY!!


If you are here you just came on over from Kathy's Blog and are on the right track. If not, why not head back to the RRR Blog and start from the beginning so you don't miss any of the terrific projects from my teamies.
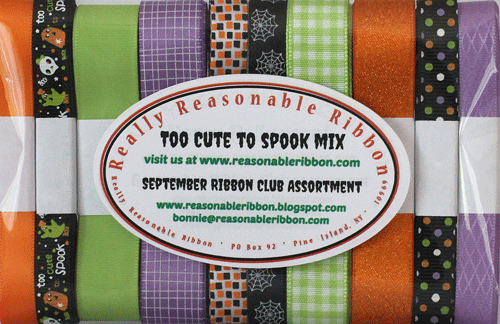
Really Reasonable Ribbon we are kicking of this months Blog Hop and showing you September's Ribbon Club Assortment Too Cute To Spook Mix. This collection is just perfect for Halloween.
I am so excited to used this up for Halloween. I hope you get a chance to grab this assortment for your Halloween decorating. :D
Just look at these wonderfully fun colors the orange, purples,greens and the 3/8 inch grosgrain and satin ribbons are just lovely.

Monthly Ribbon Club, Domestic

I couldn't help myself when I saw this ribbon assortment I had to make a Halloween Wreath. 
For center of my wreath I used an old Halloween window decoration
I had for years. It like a sun catcher, you put it in the windows and it 
shines pretty like stained glass. But this is made from plastic. I glued it 
down in the middle of the wreath. 

Here is a close up of the the wreath. 
I added lights to back of it. 
To make the wreath I wrapped Black Satin w/grosgrain edging around the
wreath first then I wrapped the Gauze Print on Grape Satin Ribbon. I then tied
all the ribbons around on top of the black and purple ribbons. I did double
up some of the ribbons.  Aren't these ribbons so adorable and beautiful? 
They are just perfect for Halloween. 


Supplies I usedSeptember's Ribbon Club Assortment Too Cute To Spook Mix.; 5/8 Satin with Grosgrain Edge Black
From My Stash - Grapevine Wreath, plastic Halloween window decor and lights.

Hope you all are having a great time hopping along to all the Blogs. 
Thank you all for stopping by today. You can find these wonderful Halloween ribbons at  Really Reasonable Ribbon store. And join us for a our next fun challenge coming up this week.
Next you will want to head over to Cherry's Blog to see her wonderful project.
Have a great time 
and
Hugs, 


Deborah xxx