Followers

Showing posts with label DCW paper collection. Show all posts

Saturday, June 8, 2024

Happy Father's Day Cards - Megaphone Shaker and Chipboard Helm and Anchor

Happy June everyone, 

It's a new month which means new projects using Clear Scraps products. I have created some fun Father's Day Cards using some great pieces from Clear Scraps. When I saw the Megaphone in the online shop I new exactly what I wanted to create with it and same with the Chipboard Helm and Anchor. I was just so excited. I hope you enjoy the step by step tutorial today. 

Here are the products and links for these fun Father's Day Cards. 

Chipboard Helm and Anchor                              Mini Shaker Megaphone


Card 1 - Megaphone
Here are the measurements for Card 1 as it is a Pop-up Gatefold Card.
For this you will cut cardstock at 5 1/2 x 8 inches.
Score with 8 inches along the top of the score board at 2, 4, 6 inches. Place the cardstock in the trimmer at 1 1/4 inches and cut from 1 to 7 1/2 inches slide to 4 1/4 inches and cut again from 1 to 7 1/2 inches. You should have 2 slits now. Next place the cardstock back on your score board and Score 3 1/2 and 5 inches.

Next trace the back piece of the megaphone onto a piece of pattern paper and cut out, and adhere to the megaphone. You then want to adhere two of the megaphone frames together, then remove the film from the acetate and adhere the acetate on top of the frames you just adhered together. The last frame you can paint, or color in with markers or any thing you would like, then adhere on top of the acetate. 


Next add in your shaker bits and adhere the entire megaphone pieces together. 
Be sure to burnish down well. 


Here is a close up of the megaphone placed on the middle panel of the card. I added Happy Day in gold stickers from my stash. . 


Here is the finished card. I layered my panels on the sides and I also added panels on the back. You can decorate you card how ever you'd like. 


Card 2 - Chipboard Helm and Anchor

For Card 2 it's super easy to create. This is a single step card. 
Cut cardstock at 5 1/2 x 10 1/2 inches. Score at 1 1/4, 2 1/2, 4 1/4, 6, and 8 1/4 inches. 
Fold and burnish.


Next we are going to decorate the chipboard pieces using gold leaf, this is a light weight paper that is flaky and sticks to the adhesive. We are going to use the chipboard frame from the helm and anchor. Place some glue on the anchor first. 


Next place down the gold leaf on top of the adhesive and keep adding it as you apply the adhesive down. Once you finished simply just peel of the sides that overlap the chipboard. It tears off easily. 


Do this for the frame and anchor as well. I paint the helm with black gesso, I did the front and back. I then added the gold leaf around the middle. Let them dry. 


Next I cut panels and adhered them to the spaces that will show, you can also add panels to the back if you'd like. 


Next I adhered on the frame in the back, anchor and helm. I also stamped a sentiment in the front of the card next to the helm. Since the frame is on the back of the card and it is a bit heavy I added a little stopper. 


Here is the the stopper. simply cut a 1/2 x 2 inch piece and fold each end about 1/2 inches in and then fold in the middle. Adhere each end to the inside of of the card, as shown, it kind of looks like a "W". 


Here is what the finished card looks like. I think this looks so cool. I have not done a card like this before so I think my vision of this card turned out really good. 


I hope you enjoyed today's tutorial sharing how to create wonderful Father's Day Cards using some of Clear Scraps chipboard and shaker products. I just had so much fun creating these. 
As always Thank You for joining me today. 
Happy Crafting my Friends, 


Friday, September 9, 2016

Christmas Cheers

Hi all,

Hope you all are doing well. I have been busy I have some wonderful things to share with you all this coming week. Hope you all stay tuned.
I am here sharing a Christmas card I created using some wonderful ribbons from Reasonable Ribbon Store.
For this Christmas card I used the some beautiful Swiss Dots Grosgrain ribbons 
along with the 1.5 inch Jute Ribbon Red
The paper stack is DCWV Home for the Holidays Collection.  

Here is a close up of the ribbons I used and the beautiful 
I really like how the Swiss dot red and green ribbons are just so vivid, 
really pretty against the mixture of reds,white and green in the paper. 
I thought the Jute added a nice touch against the kraft paper. 


Supplies:

Challenges entered:
Word Art Wednesday - Anything Goes - Challenge weeks 246-247
The Sisterhood of Crafters - Pretty Pretty Ribbons
Inspiration Destination Challenge Blog - Anything Goes Challenge No. 102
Crafting By Designs - Ribbons
DCWV card sketch challenge


If you are looking for some beautiful holiday ribbons to use on your cards or craft creations you really need to check out the Reasonable Ribbon Store, there a lot of beautiful ribbons and don't forget to look at the flowers too.
Thank you all for joining me today and don't forget we have our Challenge you can join using Autumn Colors is the theme. Also we have a fabulous Blog Hop coming up on September 13th you won't want to miss it.
Have a Great Day, 
Deborah xxx

Thursday, August 18, 2016

Helloo Deer

Hi all,

Hope you all are having a wonderful week. It's been a busy week so far and a little cooler here in Texas with temps in the 80's. :D  I hope you all are doing okay. I am here sharing a card I created for my some upcoming birthdays this fall so to start it off I created this masculine card.

Here is my card -

Today I have a wonderful masculine card for you all. A simple layout and using a couple of ribbons from Really Reasonable Ribbons that were perfect for this masculine card. I used 1.5" Brown Netting . I like how it added a bit of texture to the background and then I used the Textured Two-Tone Brown/Antique Gold with a gold button in the middle.
I really like how this card looks rustic, it turned out really cool with the ribbons and paper together. And the deer photo coordinates perfectly with the Textured Two-Tone Brown/Antique Gold.  I just love that ribbon it's so pretty but adds a great touch to a masculine card.


  I used 1.5" Brown Netting as part of my background again. 
I think it adds a really nice texture to the inside of the card as well. 

Supplies: Really Reasonable Ribbons -  1.5" Brown Netting Textured Two-Tone Brown/Antique Gold
Paper: DCWV - The Rustic Stack; Ultimate Tag Stack
Ink: PowderPuff - Amareto
Stamps: Stamp in Up stamps that were in my stash
Accessories: Stickles - champagne, gold button, TH ideaology - industrious stickers - Gallery (corner pieces)

Challenges entered:

Thank you all for stopping by today, I hope you are inspired to try some of this really lovely Netting, it comes in many beautiful colors and other ribbons from the store  Really Reasonable Ribbons .
Hugs, 
Deborah xxx 

Wednesday, May 18, 2016

Sending a Warm Thank You

Hi all,

I hope you all are having a good week so far. Thank you all for joining us during our Blog Hop on Friday. Hope you all were inspired and decided to get some of that gorgeous Patriotic Ribbon Collection.

Well today I bring you a card made with the Pink Sheer with Satin Center Ribbon, but this beautiful ribbon also comes in an Assortment package -   Pastel Sheer w/Satin Center Assortment. Another super gorgeous ribbon assortment I must say.

This pink ribbon shines beautifully just like glitter. I also used Wild Orchid Crafts - Sweetheart Blossoms 2-Tone Baby Pink with the 35mm Trellis Roses mixed pink tones.


Here is a closeup of the Pink Sheer with Satin Center Ribbon.
Isn't that Sheer so pretty with a satin center, it's so shiny!! 
I can't wait to try the other colors that come in this assortment package.

This reminds me of a small bouquet of flowers. 
I like how the pretty pink bow and flowers stand out
 from the card stock I used, it adds a nice touch of elegance. 

Challenges entered:
DCWV - sketch challenge (using Butterfly Garden paper stack)

If you like everything I used please click on the links or click here - Really Reasonable Ribbon.
Thank you all for stopping by today and hope you were inspired to give this beautiful  Pink Sheer w/Satin Center Ribbon a try or the Pastel Sheer w/Satin Center Assortment it is simply gorgeous.  

Wishing you all a wonderful rest of the week and Stay Crafty
Hugs, 
Deborah xxx

Sunday, April 17, 2016

Beautiful Wings Shine On

Good Day All,

Hope you all are enjoying your weekend. Today my family and I went out to Trades Day here in North Texas. We had such a fun filled day in this super beautiful weather and believe it not I didn't find anything crafty. lol

Well today is a new challenge at One Stitch At A TIme, challenge 260 - Anything Goes with Wings. So get out your critters with wings we would love to see your beautiful creations.

For my card I used Waterlily digital stamp by CraftyGirl Creations from the Stitchybear Outlet Store.

This image was colored with my copics and used brown flock on my cat tails. 
For the dragonfly I used green stickles and crystal stickles on the wings. 
The background was inked with Stampin Up - Bliss Blue. 
The paper is from DCWV Birds and Butterflies. 

Our Sponsor
Do you wanna win!! You Gotta Play


Supplies:
Stamp: Waterlily digital stamp by CraftyGirl Creations from the Stitchybear Outlet Store
Paper: Neenah; DCWV - Birds and Butterflies
Ink: Copics; Stampin Up - blue bliss
Accessories: brown flock; green ric rac; Stickles - green and crystal; butterfly from a friend

Challenges entered:
A Beautiful Mess: Challenge #1 - Always Anything Goes
Come and Get It Challenges: Challenge # 114 Things with Wings
Crafty Calendar Challenge: Anything Goes with our April Challenge
Fussy and Fancy Friday Challenge: Fussy and Fancy Challenge #161 "Green & Pink"
Kitty Bee Designs: Aloha Friday Challenge #69 - Living Things with Wings.

Thank you for joining me and stopping by today.
Deborah xxx


Friday, March 25, 2016

A Little Color of Happy

Hi all,

I hope all is well where ever you are. I know some parts of the states had some snow fall, while other's have had terrible rain & winds. Well I think Spring has sprung. Here in North Texas it has been lovely, sun is shining and it's just gorgeous....Til you step outside and need a light jacket and the wind picks you up to carry you off. lol   So no matter where you are I hope you all are safe and warm.

I am up on the Crafty Card Gallery! 
Do you have any special "female" family members or friends you need a Birthday card for within the next few weeks or months?? Well the card I am sharing today is a card you can make using anything you have on hand. As long as you have a few sheets of patterned paper, punch, brads or color sprays.  

I made this easy card today using a square punch, corner punch and a border punch, and Recollections brads,a couple of DCWV paper stack and a A2 card (pre-embossed) from their card/envelope stack. I also used Prima Bloom Sprays. (All supplies listed below)

I used a sketch  from DCWV this month to make this card using a couple of their paper stacks. I have to say the sketch was definitely a challenge. lol   But what a fantastic look for a card once I was done.
DCWV has a monthly sketch both for layouts and cards.

The card sketch


Here is my Card -
I sprayed the outside of my card first with my Color Bloom Sprays, set aside to dry. 
I punched out 10 squares and used my corner punch on opposite side of the 
squares for the odd shape, and layered. 
I used the Martha Stewart Daisy Edge punch, wrapped pink twine around 4 times. 
Fussy cut the flower, the brown border flag with the
orange sentiment. Used 5 Recollections brads - 1 on flower & 4 on the
punched border. 

Supplies:
Papers - DCWV - Collage Art paper stack; the Celebration paper stack (Happy Birthday sentiment only);
Inks - Prima Color Bloom Sprays - Cotton Candy, Soft Teal; Iris
Accessories - Recollections brads- Fall; Martha Stewart - Daisy edge punch; Corner punch;pink twine from stash

and other challenges listed below  - 


Thank you for stopping by my blog today. I invite you to head over to Crafty Card Gallery to check out my teamies creations, you will get some wonderful ideas.  I wish you all a great weekend and hope that you find some inspiration from my posting today.  Also don't forget to stop by DCWV blog and their Facebook page the DT has some great inspiring things for the spring season.
Please come by again. 

Hugs, 
Deborah xxx

Sunday, February 21, 2016

Pop It Up!

Good Sunday Morning,

I hope you all are having a beautiful weekend.

Today starts a new challenge at One Stitch At A Time, Anything Goes with 3D (a box, bag, pop up creations or anything 3D)

I have used an image from StitchyBear, Digital Stamp Store created by BBKakes - Babybug Set. I love this little digital stamp set. It comes with 6 images - girl bug, butterfly, snail, ladybug, dragonfly and flower.
It's so cute and so versatile you can use on cards, scrapbook pages and to decorate altered items too.
I used these cute little images on a pop-up card.

I enlarged the images just a little and printed out 3 times on neenha cardstock 
and colored with my copics. I fussy cut the images out and
 then placed them around my card with pop dots. Cute out a 
Happy Birthday sentiment with my Cricut and 
placed on the front of the card.  

Here I popped up some of the images on the inside flap and used felt clouds.
The flowers, Babybug, and snail are all standing up with the tabs cut from the back of the card. 

The Prize for this Challenge a $10 dollar Gift Coupon!!


Supplies:
Stamps - StitchyBear, Digital Stamp Store created by BBKakes - Babybug Set.
Paper - DCWV papers stacks - The Celebration and Vintage Collector Stacks; DCWV - 2A Cards (3 color pack) with envelopes. Neenha cardstock
Inks - Copics
Accessories - Crystal Effects, felt clouds, pop dots, stickles ( a little); Cricut - Happy Birthday sentiment.

Challenges entered:
Inkspirational: Challenge#102 - Pop
Digidesignchallengeblog: Birthday Challenge
Crafting with Dragonflies Challenge Blog: #51: Birthday Card
Allsorts Challenge Blog: Week 351 - Birthday Wishes
Wags 'n Whiskers Stamps: Challenge 171: Let's Party
Simply Papercraft: Challenge 23
Chocolate, Coffee & Cards Challenge: #103 - Anything Goes
Creative Fingers Challenge Blog: Challenge #103
Craft for the Craic: February 2nd Birthday Challenge
Challenge blog: Challenge#145: Anything Goes
Crafting for all Seasons Challenge Blog: Challenge 120 - Three of a kind
Decorate to Celebrate: Decorate To Celebrate Anything Goes Challenge #4
Inspiration Destination Challenge Blog: Anything Goes Challenge #73

I would like to invite you to join the One Stitch At A Time Challenge - Anything Goes with 3D. We would love to see what 3D project you create. Plus you can Win a $10 coupon the StitchyBear Store. Please click on over to the One Stitch At A Time Challenge Blog and leave some love for my DT sisters. And Don't Forget we have a Monthly Challenge on our FB Page too.

Thank you for stopping by and 
wishing you all a wonderful Sunday.
Stay Crafty, 
Deborah xxx

Saturday, December 5, 2015

Peace for Christmas

Good Morning All,

I have been making ATC's for a while and have a few I would still like to share with you. But today I am so excited to share this one I made for a swap and using some of my favorite things.

Of course Prima is one of my favorite, along with Graphic 45 paper collections and using DCWV- burlap paper along with using TH distress inks and Spellbinders dies.

Here is my ATC - This just turned out so pretty. I loved it!! :D

  • For this ATC I started with Graphic 45-Twelve Days of Christmas for the backing using distress inks - vintage photo. The Graphic 45 paper red stripped paper edges is distressed with DI - barn door and is also layered on top of the burlap from DCWV - burlap paper which is distressed with vintage photo. 
  • Cut out the foliage using G45 Twelve Days of Christmas with Spellbinders - Foliage dies and used DI-pine needle. 
  • I used a fame the Prima Marketing -Shabby Chic Treasure Collection that I sprayed a couple of times with Fireworks - Lady Bug. Used Pima Marketing Holiday Crimson  Poinsettias from last years Nov. Magical Kit. The little red flat back pieces were in my stash and so I am not sure whee they are from. 
  • The word PEACE is from G45 Twelve Days of Christmas and secured with adhesive. 


Well that's it. I hope you like it and find some inspiration for your Chistmas decor or card making. 

Wishing you a beautiful day and a wonderful week ahead. 
Stay Crafty and Hugs,
Deborah xxx

Sunday, August 9, 2015

Happy Birthday Cupcake

Happy Sunday,

Today a new challenge at One Stitch At A Time Challenge #243 Anything Goes with Sweet Treats. This is gonna be fun!! So please join us and show us some of your creations using Sweet Treats. :D

Here is my card: For this card I used Alipeeps image - Cupcakes just press on the name and you will be taken to Stitchybear Digi Outlet Store. I did a pretty simple shaker card with no dies or fancy edges. I wanted to do something basic because I know some people are just starting out in our stamping world and this is a great card to show how you can make a card using a few basic items.


Our Sponsor
THE PRIZE
C

Supplies:
Stamp: Stitchybear Digi Outlet Store- Alipeeps image - Cupcakes; SU - Happy Birthday stamp
Ink: Copics; StazOn
Paper:DCWV Paper Collection - Celebration
Accessories: yellow gems by Want 2 Scrap; birthday sequins from stash; stickels on the cupcakes - crystal & frosted lace; liquid pearls - white and yellow; Circle punch; Acetate

Challenges entered:

Thanks so much for stopping by and have a wonderful day. Don't forget One Stitch At A Time also has a facebook challenge too. https://www.facebook.com/groups/stitchybeardigioutlet/  
So come over and join in that one too. :D 
Hugs, 
Deborah xxx

Saturday, June 20, 2015

It's a Toy

Hi all,
I hope you all had a great weekend with family and friends. Here is a card I made for my granddaughter's birthday and it was nice to see all the family together to celebrate her 1 year. She is just the cutest. hahhaaa but I am a bit bias. lol
Well I wanted to share with you a card I made using the Cricut Explore. I am liking this machine more and more everday, seriously. :D
I didn't really use it a whole lot in the past years but lately I've been using it a lot. I have some other goodies to share with you all well. (heheheee) Will be posting those soon. :D

The Birthday Card I made is using an image from the cartridge Baby Steps - Toy. The image is just adorable, and so easy to cut.

It Wobbles!! :D 


Here is what the wobble looks like. It has adhesive so 
you can attach it to your image. 

 Here is a close up for you all. :D

The paper I used is from a DCWV stack The Celebration Stack. Awesome stack has so many foiled paper in that stack and tags and cards you can use to make Birthday cards, scrapbooks and altered items.

Other supplies: Candies - flowers circles (candies), googly eyes, and little pompoms, Dot's embossing folder and pink chalk for the cheeks. Colored cs from my paper stash bin.

Challenges entering:
Action Wobble Challenge: Wobble Wednesday Challenge Anything Goes
Simply Papercraft: Challenge 7
Sister Act Card Challenge: Challenge #111
Craftyhazelnut's Patterned Paper Challenge: Craftyhazelnut's Patterned Paper June Challenge
Scrappy Moms Stamps:Terrific Tuesday Challenge - Happy Birthday

Well I hope you are inspired to try out these little wobblies, they make cards so much fun. And believe me, you will like having them.
Thanks for joining me
Happy Crafting,
Deborah xxx

Sunday, May 3, 2015

Travel Across The Miles

Hi all,

Yeah, we are finally all moved into the new house. :D  And now the fun part unpacking. hahaha
Once I get my crafty room all set up I can get back to normal crafting. Believe me I have going through with drawls big time.

Today I have another Guest Design Team card I made for Quirky Crafts Mid-post Challenge #9. This time I made a "penny slider card". It's when you use two pennies to slide the image back and forth. Although this image was pretty big I had to use 4 pennies. I thought it turned out pretty cute, the car can travel along the slot. :D

Here is my card:
I made my own sentiment again


Close Up 

Our Sponsor

PRIZES:
1st prize - 3 images of choice from the StitchyBear Store
2nd prize - Any 3 images from DT's images
3rd prize - Any 2 images from DT's images

Supplies:
Stamps: Drivers Ed by StitchyBear from StitchyBear Digital Outlet Stamps
Inks: Copics
Paper: Recollection - Blue Cardstock; DCWV - Vintage Collectors paper stack
Accessories: yellow gems, Stampin Up - slot punch; 4 pennies; adhesive pop-ups

Challenges:
Simon Says Anything Goes/Simon Wednesday Challenge Blog
Crazy 4 Challenges: Crazy4Challenges - C4C284
Craftyhazelnut's Patterned Paper Challenge: Craftyhazelnut's Patterned Paper May2015 Challenge 
Mema's Crafts: Mary 2015 Challenge - Anything Goes

Thank you for stopping by today. I hope you were inspired today. Please join in the fun Challenge #9 at Quirky Crafts for this fun challenge "Let's go on a Quirky Journey".  And please leave some love for the Design Team. :D

Hugs,
Deborah


Sunday, April 19, 2015

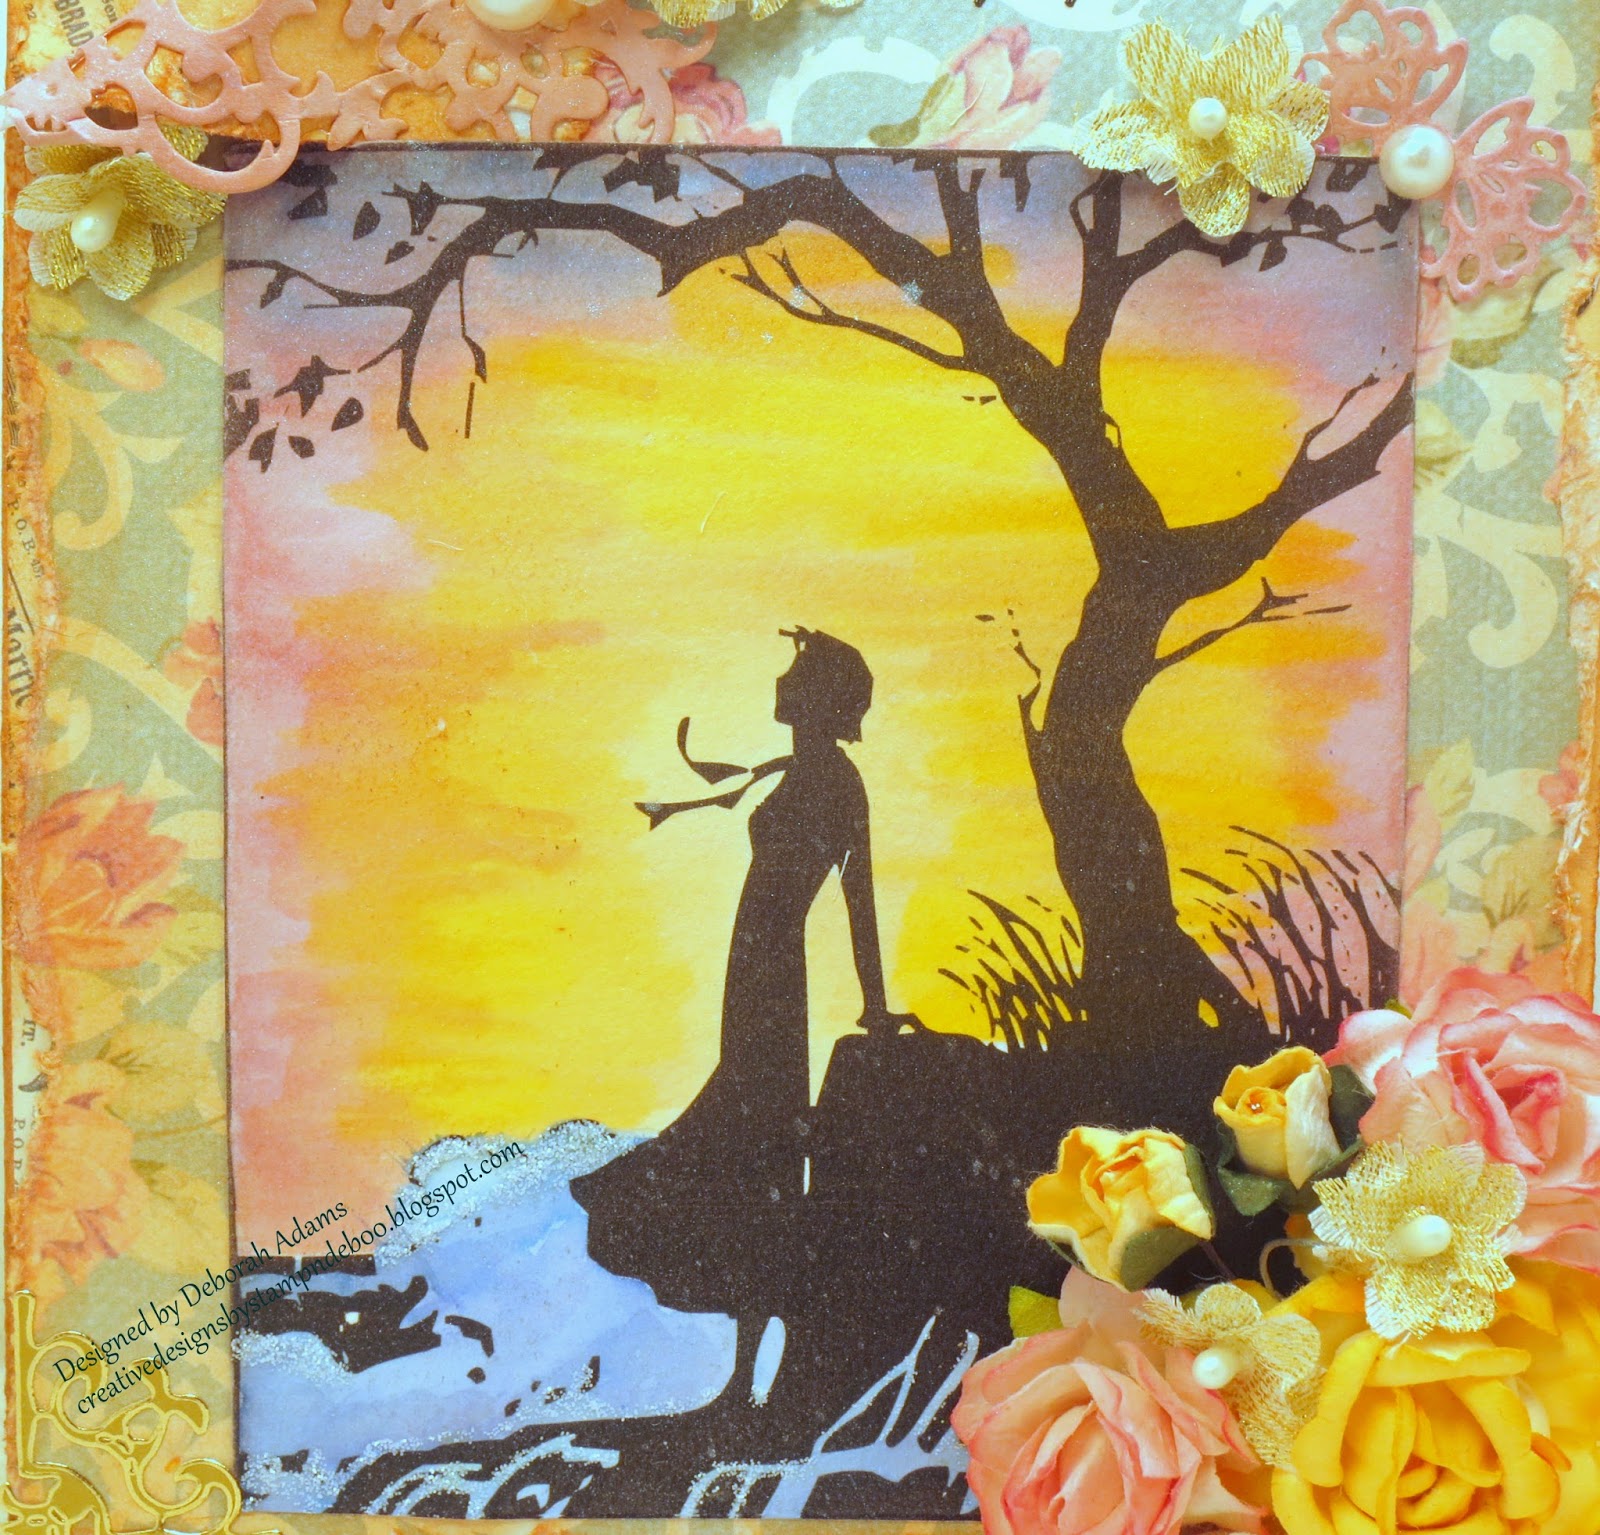
Vintage Sunset Silhouette

Good Day All,

I know it's been a while since I posted but if you have read pasts posts you all know I am in the middle of moving. What an ordeal this has been, it's been like a roller coaster. So we have about two weeks left till May 1st, and I finally found a house. YEAH!!!! So the move is on....packing up the house and of course cleaning things out. Getting rid of tons of stuff, I thought about having a garage sale but then I wouldn't have time here and would have to move the stuff over to the new house and what's the point. right? So I am taking it down to the Goodwill.

Today my Guest Designer card for Quirky Crafts Mid Post Challenge #8 Blooming Quirky has something I usually don't do. But I've been really wanting to try this since I was inspired by a bunch of different uses of water coloring videos I've been watching. I don't use many silhouette images so I hope you all like my card.

Here is my card:


 Used TH Distressed inks for watercoloring the background. 
I wanted to create a sunset type scene that I've seen in photos. 
It had pinks, blues and yellows, I love this type of sunset, it's so beautiful. 
Since this is my first time I used a variety of colors
to create the look. I thought for my first time it turned out okay. 

Supplies:
Stamp - Crackbox Palace - SeaBreeze Silhouette
Paper- DCWV - The Primrose Collection
Inks- TH Distressed inks - spun sugar, victorian velvet, faded jeans, stormy sky, scattered straw, mustard seed,
Accessories - Used stickles - frosted lace, corner dazzles, flowers from stash, pearls from stash. Spellbinders Die - Devine Floral

Challenges:
Challenge up your life: Challenge #13-Watercolor
Hiding in My Craft Room: HIMCR #196 - Freestyle
Simon Says Make Your Own Background/Simon Wednesday Challenge Blog:
Simply Papercraft: Challenge #2
{PIN}spirational Challenges: {PIN}spirational Challenge #138


Our sponsor is Crackerbox Palace you can some wonderful stamps from their store. Find out more details what prizes you can win. (here)

I invite you to stop by and take a look at the DT creations they are so inspirational. :D You'll love it.

Thanks for stopping by and have a great day!
Hugs,
Deborah xxxx


Sunday, May 25, 2014

French Vintage Tea Party

Good Day All,

I have a fab post today I think you will enjoy. I was selected to be a Guest Designer this week at Scribble an Scrap Blog & Challenge for Challenge #19-Anything Goes.  I'm so excited to be chosen to be a GD at Scribble and Scrap she has wonderful vintage photos, digi stamps, papers and other items as well. And the DT well they have fabulous inspiration for you to just Oooo and Awww. Please go check them out and join in the fun. We can't wait to see what you create. :D

So I am sharing my first Vintage Box. I wasn't sure how it would turn out, cause as you know you think of one thing and it ends up looking like something else. Right?? Well this turned out better than I expected. I hope you all enjoy it and I have lots and lots of pics. And the big surprise - You will never guess what I made it out of?? I'll tell you at the end. Lol

Here we go:


Front of the box with the swing latch lock

Back of the Box

Bottom of the box

Close Up of the Vintage Photo from Scribble and Scrap 

Close Up of the Butter I made out of metal flowers

Inside of the box - Pocket is on the lid with tags: 1 for journaling and one to apply pictures to front and back.

Close Up of the pocket that holds tags and another butterfly. **See the little teapot charm - so cute. ***
Found that little charm at the gift shop in hospital where my granddaughter was born. 

Another Closeup of tag with Teapot Charm with seambinding

Close Up of the journaling tag and picture tag


Supplies Used:
Paper: DCWV - The French Country Stack (love the designs on this paper stack); G45 - Botanical Tea
Inks: TH Vintage photo - edged on all the paper, and butterflies, tags and the picture frame; Smooch Pealized Accent Ink - Molasses used on the corner metal embellishments (let dry for couple of hours)
Stamps: G45 Botanical Tea - Sentiment on the tag on top "Tea Party" and the Sentiment on tag adhered on the inside of the lid. Powder Puff - Pink Cheeks; StazOn for the Tag on the inside lid because its glossy.
Accessories: Momenta metal embellishments, Petaloo flowers, Recollections - white floral embellishments from Michaels; Wooden legs from Michaels (wood dept area); SpareParts - white frame from Hobby Lobby; Want 2 Scrap - Pearl Swirls; Used glossy accents and Glitter Art as my adhesive; TH metal embellishments on journaling tag; String pearls & Lace from $ bin at JoAnn Craft Store; Punch from MS - lace punch (can't recall the name); Recollections Tags (these are the new tags just in with the vintage looking knobs and stuff) @ Michaels; The Latch is from Stamping Asylum (Plano, TX)
From Stash: seambinding pink and vanilla, used jewelry wire for butterfly body and antennas, twine

To make Butterflies - used the bronze looking flowers from Momenta @ Michaels - cut 2 petal off the Metal Flower, left 4 petals and separated. Cut recollections glittered flower - inked with Vintage Photo & Pink cheeks ink placed metal on top of the flower, wrapped wire around it and the made the antennas. Used Glossy Accents to adhere.
Wooden legs I colored with Copic marker R11, inked around it with TH vintage photo, adhered with hot glue.
Used TH Vintage Photo to rub onto the White Frame for vintage effect.
Whew....Well I hope I got everything, if you have any questions please leave me a comment.
Oh, Yea, what is it made out of ..........................................................A Kool-Aid Box.

Challenges entering:
CraftHoarders Anonymous Challenge Blog: Challenge #8 Show Us Some Metal or Glass
Through The Craft Room Door - TTCRD May 20-26, 2014
Altered Eclectics: Challenge 1st of May - Anything Goes
Outlawz - Paper Ala Mode - May 24- May 30 Anything Goes
Paper Creator's Crafts: Challenge #24 Flowers and Bows
BrownSugar Challenge Blog: Challenge #95, Anything Goes
Live & Love Crafts Inspiration and Challenge Blog: Challenge #23 Tinchy's Inspriation Collage
SunFlowerfield: Sunflower Designs Monthly Challenge - Vintage/Shabby Chic/Rustic
Alphabet Challenge Blog: H for Handmade Embellishments
Kraftyhands Challenge Blog: May Challenge Anything Goes
Creative Fingers Challenge Blog: Challenge #37

I hope you enjoyed my French Vintage Box. I really had a great time making this, and plan to do another one. : D Please join us for a fun challenge over at Scribble and Scrap Blog and Challenge and go by to check out the shop Scribble and Scrap. (awesome vintage photos)
I hope you all have a fantastic Memorial Day weekend. We have family coming in from out of town to see baby Reminie. : D
Oh' Please join in for my Give Away you still have a couple of weeks. Tell your friends! :D
Thank you and Stay Crafty,
Hugs, Deborah