Followers

Showing posts with label Prima Marketing Color Bloom Sprays. Show all posts

Friday, March 25, 2016

A Little Color of Happy

Hi all,

I hope all is well where ever you are. I know some parts of the states had some snow fall, while other's have had terrible rain & winds. Well I think Spring has sprung. Here in North Texas it has been lovely, sun is shining and it's just gorgeous....Til you step outside and need a light jacket and the wind picks you up to carry you off. lol   So no matter where you are I hope you all are safe and warm.

I am up on the Crafty Card Gallery! 
Do you have any special "female" family members or friends you need a Birthday card for within the next few weeks or months?? Well the card I am sharing today is a card you can make using anything you have on hand. As long as you have a few sheets of patterned paper, punch, brads or color sprays.  

I made this easy card today using a square punch, corner punch and a border punch, and Recollections brads,a couple of DCWV paper stack and a A2 card (pre-embossed) from their card/envelope stack. I also used Prima Bloom Sprays. (All supplies listed below)

I used a sketch  from DCWV this month to make this card using a couple of their paper stacks. I have to say the sketch was definitely a challenge. lol   But what a fantastic look for a card once I was done.
DCWV has a monthly sketch both for layouts and cards.

The card sketch


Here is my Card -
I sprayed the outside of my card first with my Color Bloom Sprays, set aside to dry. 
I punched out 10 squares and used my corner punch on opposite side of the 
squares for the odd shape, and layered. 
I used the Martha Stewart Daisy Edge punch, wrapped pink twine around 4 times. 
Fussy cut the flower, the brown border flag with the
orange sentiment. Used 5 Recollections brads - 1 on flower & 4 on the
punched border. 

Supplies:
Papers - DCWV - Collage Art paper stack; the Celebration paper stack (Happy Birthday sentiment only);
Inks - Prima Color Bloom Sprays - Cotton Candy, Soft Teal; Iris
Accessories - Recollections brads- Fall; Martha Stewart - Daisy edge punch; Corner punch;pink twine from stash

and other challenges listed below  - 


Thank you for stopping by my blog today. I invite you to head over to Crafty Card Gallery to check out my teamies creations, you will get some wonderful ideas.  I wish you all a great weekend and hope that you find some inspiration from my posting today.  Also don't forget to stop by DCWV blog and their Facebook page the DT has some great inspiring things for the spring season.
Please come by again. 

Hugs, 
Deborah xxx

Sunday, March 6, 2016

Valentine's Cards for Operation Valentine's

Hi all,

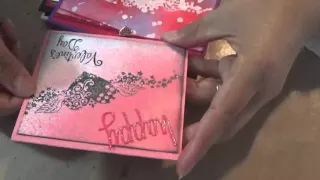
I finally posted my 2 video regarding the 50 Valentine's Cards I made for Mel B's Operation Valentines.
Please take a look at my YouTube video and subscribe once I reach 100 followers I will have a prize. I am also looking to increase my blog followers too.

In this video I take items that I already had in my stash to use to make 50 cards. You will see many different style of cards, some that I had in my card case for years and I gave them an upgrade. I used different techniques from tearing paper and adding embellishments you have on hand to using my gelatos to create a beautiful look to your Valentine's cards. I also used sprays from Tim Holtz, Color Bloom and Heidi Swap to create a look that is very stunning.

If you have any questions or would like to see a video/tutorial on how to make some of these cards please leave me a comment.


YouTube Video - Valentine's Cards for Operation Valentine's


Thursday, March 5, 2015

A Tooth Fairy that Twinkles

Hi all,

Today I get to share a special gift I made for a special someone, my granddaughter. Although she hasn't lost any teeth yet, actually she's still getting her teeth in. lol   I got an early start on her little Tooth Fairy Box. This little box uses a stamp from Crafty Sentiments Designs Shop "Twinkle Fairy", she is just cute. Love this stamp, as I was using her idea's kept popping up in my head on how to use her. She is so versatile, you can use for cards, scrapbook pages and other crafting projects.

My Tooth Fairy box is on the Inspirational Blog so please stop by and leave a comment for me. I would really appreciate it. :D  If you want to see this stamp or go to the Inspirational Blog just click on the names the links will take you directly to the pages you want to see.

Well won't delay any longer, here is my box... I will list instructions on top of the each photo.

***Colored my images with copics and cut out image with Spellbinders die. 
The box I used is a wooden box from Michaels. I painted white then sprayed with 
Prima Marketing Color Bloom sprays and once dried went over it with a little
Distress ink faded jeans (not heavily).  
The stars are made with the TH Stars stencil and I textures paste mixed with
Distress Mustard Seed paint (mixed) and then apply. It dries pretty fast. After it 
dried I applied Stickles to the Stars. I drew some tooth images and 
printed out, then applied stickles around them. Used Wink of Stella Clear on her 
wings and outfit. 

***I placed some sparkles in her hair and around her***
To get the night sky I colored the stars yellow then heat embossed with clear 
embossing powder and then when over with my distress inks. 
The clear embossing prevents the ink from coloring the stars. 
To get my night sky I used TH Distress inks - chipped sapphire, 
broken china & a little seedless preserves. 

Applied lace around the box. 

***The box comes in two pieces. I adhered two hinges in the back so it becomes
one piece. I placed a little pillow inside for the tooth and I wrote a little
saying applied to the inside lid with pink string pearls, another tooth with
sparkles. I went around the saying with Distress Ink,

***Would like to give a special Thank You to Jennifer McGuire who shared her idea on how to 
make a Night Sky. Clink the link below her name if you would like see how she did hers. :D
Thank you Jennifer 

Supplies:
Inks: TH Distress Inks/Paints - mustard seed paint; Ink - faded jeans, chipped sapphire, broken china and victorian velvet; Prima Marketing Color Blooms Spray - cotton candy, tea stain; Copics
Paper: Neenha paper
Accessories: Wooden box, hinges, Stickles - mercury glass; string of flat pink pearls;pink organza, Poly fiberfill for the little pillow; Spellbinders - decorative labels twenty-eight; lace & ribbons; Clear embossing powder
I made the tooth and sentiment.

Challenges entered:

Please stop by our Inspirational Blog where we have something everyday posted by my teamies to give you continuous inspiration for your crafty projects. I also invite you to take part in our Challenge Blog before Sunday night. Our Theme is "Spring Colours" if you join you could win a Voucher to the Crafty Sentiments Shop. And leave some love for my teamies, they have made some beautiful creations for our Spring Theme. :D

Wishing you a great day and Happy Crafting! :D
Deborah xxx