Followers

Showing posts with label rub ons. Show all posts

Friday, October 10, 2025

MemDex Cards Layering using Simple Stories Autumn Breeze

 Hi everyone, 

It's Deb here today sharing with you a few ways to create some beautiful layered Memdex Cards using the 2025 October Scrapbook Kit. You can find these Memdex cards in the Tres Jolie Shop and I have link below for you. I also have the step by step down below sharing 6 Layered Memdex Cards, along with the video tutorial.


2025 October Scrapbook Kit                             Chipboard MemDex Cards

           Load image into Gallery viewer, Memory Dex Cards

Let's Get Started. :D 

MemDex Card 1

For our first card we are will be using the Simple Stories Autumn Breeze Rub-on's. First cut out what you'll be using on the chipboard MemDex Card. Next lay your piece of rub-on on top of the memdex, use the popsicle stick and rub on top of the pattern, cover the entire chipboard with the rub-on's. 

After I did the background I used the coffee cup rub-on and rubbed that on top. I then added some rub-on flowers and then used the pretty glittered words "hello Autumn" from the Scrapbook Kit and adhered down. 

Here is the first finished MemDex Card using just the rub-on's and the glittered words. Although we used Rub-on's and everything blends very well together, we layered the hearts, coffee cup and the flowers all top of the background we had rubbed down first. 

MemDex Card 2

For our next memdex card we leave about a 1/2 inch from the top of the scalloped edge. I used the cute brown polka dot paper but you can use want ever pattern you'd like. 

Next I adhered down on of the borders and piece of large ephemera from the ephemera packet in the Scrapbook Kit. I just love this Fall theme paper collection by Simple Stories

Here is the finished MemDex Card. I layereed here with a variety of items. I placed down the large piece ephemera with the book and then added the little squirrel underneath. I then added a heart along with the "Beautiful" sunflower sticker. On top I also added some gold border above the top using a gold marker

 MemDex Card 3

MemDex #3, I traced on paper and cut out and adhered the paper down til it meets the card holes. You can cover the entire MemDex card if you would like. Then I used one of the ephemera pieces, the beautiful Fall trees and adhered that down. 

Next I added the house ephemera piece on top layering just the right but it sits a bit over the trees. 

To finish this MemDex Card off I placed the little tab word on top "wonderful" and "memories" word is underneath. I adhered some of the bits & pieces hearts from the package around the card. Finally I adhered down the glittered word "fall" down on the left side. This is so pretty and layers just all came together so easy and quick.


MemDex Card 4

This MemDex Card I started off by adhering down one of the borders from inside the ephemera packet. I decided to take this piece of ephemera and cut around the pumpkin inside. I really like doing this cause then you can tuck something in and in this case we are going to tuck in that cute little fox. **For more details you can view the video tutorial** 

Here is the little fox tucked inside behind the pumpkin. I think this looks just adorable. 

After I adhered down the fox and pumpkin I added in a flower and a sticker on the left hand side. Below I am using my gold marker to edge the top of the MemDex Card.

To add the final touches I took one of the small tickets from the cut apart sheet and I adhered "Forever Fall" on top and edged with the gold marker. I popped it up using some cardboard. 


 MemDex Card 5

This card is quick and easy. I covered the entire MemDex Card with pattern paper. I used the frame from the ephemera packet adhering it down on top. 

I then used the little hedgehog I fussy cut him out and stuck him in the corner of the frame so it looks like he is having his picture taken. 

This one was not super layered but with the pattern paper behind it does give that view that it is layered with many different papers. I added the little "Fabulous" tab on top. and then I added a pumpkin down below with the word "fall". 

 MemDex Card 6

For our last MemDex Card I went ahead and edged the top of the MemDex Card with my gold marker. Next I cut one of tree pictures from the pattern paper. Adhered it down on the righthand side. 

Next I added some stickers along with some ephemera together umbrella, sweater, then I added in the little flower, hat, a pinecone and a clove sticker.

Here is the completed MemDex Card. Below I did add in a little banner with the word "sweater weather", and edged in gold again. 

I hope you enjoyed today's step by step tutorial. I enjoyed creating all these MemDex Cards for you all. I hope this gives some inspiration on how to layer up your MemDex cards, Cards, and other projects you create with this wonderful fun Fall October 2025 Scrapbook Kit. 
I invite you to please stop by our Facebook page to see what new items our design team has created using our monthly kits.
You can always post your projects on Tres Jolie FB page - Tres Jolie Club Cafe. 


 Don't forget to post your project on our Facebook Group Page, link is down below. 
We would love to see what you create. 
 For more details you can always view the video tutorial process, which is at the top of the page. 
Thanks again for joining me, I have all the links listed for you throughout the post so just click on the words and you will be taken directly to the store. 

Enjoy and Happy Crafting. 


Thursday, November 9, 2023

Beautiful Gift Bags using the Card, Tag & More Kit

 Hi everyone 

I am excited to share my Gift Bags with you today using the November Card, Tag & More Kit from Tres Jolie. This months kit is just awesome because you can decorate these bags for any special occasion you have coming up or place them in your stash until you are ready to use them. I have a video tutorial to share I created each gift bag. 


Here are the supplies you will need from the Card Kit. So let's get started. 


BAG 1

Cut two pieces of the green cardstock one for the front and one for back. Measuring 5 x 7 3/4 inches. Do not adhere yet.  

Score both pieces of cardstock at 1 1/2 inches. 

Next adhere both pieces of green cardstock down to the paper bag and adhere down your pattern paper on top. 

Next I chose a piece of the pattern paper from the kit with an image on it and used the 49 and Market Rub ons from the kit. I rubbed on the word "Enjoy" on top of the image. 

Here is what the image looked like after I finished rubbing it on. The rub ons are so simple to use and I like the variety of fonts they come in, they really add a nice touch to the the project. 

Next I inked up one of the chipboard pieces from the kit, these are so pretty. I used the Distress Ink ground expresso that comes in the kit to ink up the chipboard piece. 

Next place glue on top of the chipboard.

And add glitter to the chipboard piece. You can use any glitter you have in your stash. I used Distress Glitter Brushed Corduroy.

Next I adhered down the chipboard to the left hand side of the bag and I placed down my flowers from 49 and Market. These flowers come in your kit and are so cute & dainty

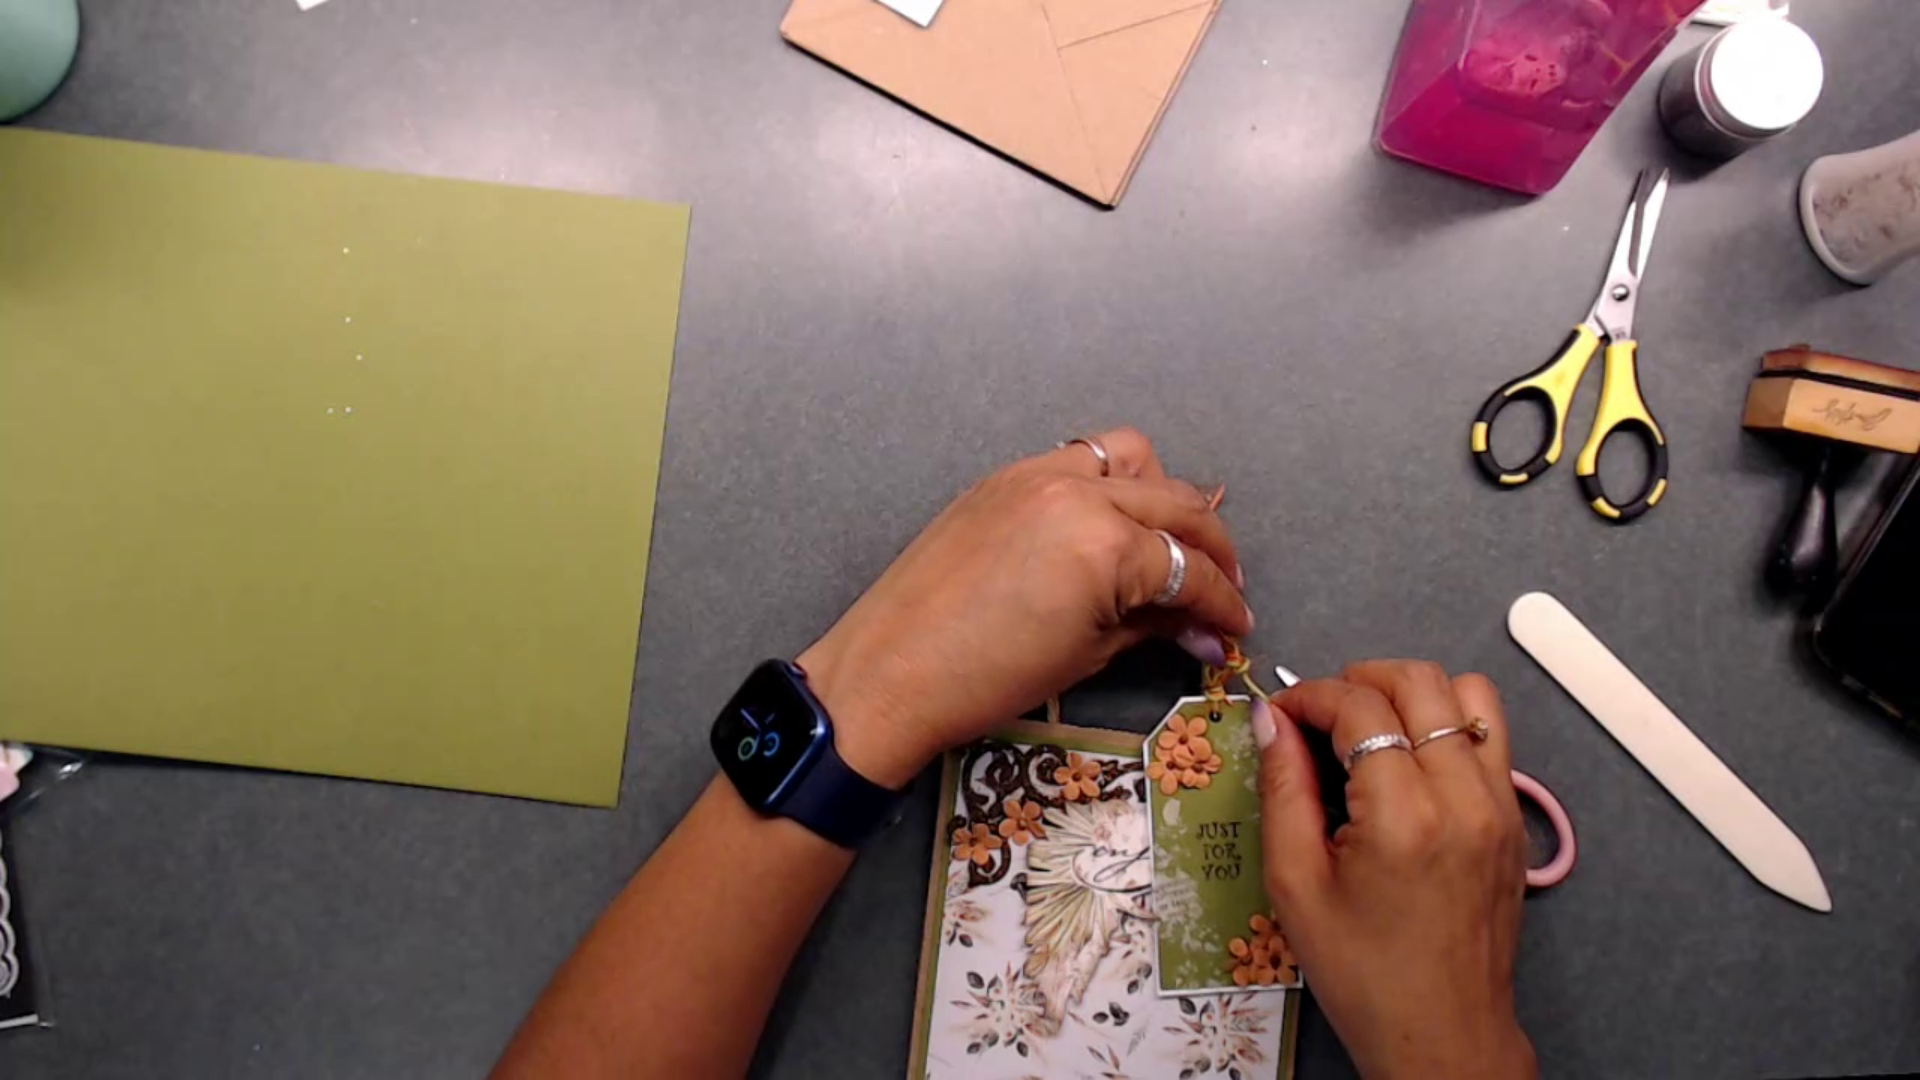
Next I tied on my tag to the handle of the bag I did use some rub ons on the tag and stamped "just for you" with a stamp from my stash. I also adhered some flowers in the upper left corner and in the bottom right corner. 


BAG 2

For Bag 2 - cut a strip green cardstock at 4 inches. And score at 2 inches

Next line your ruler up to the folder part of the strip and come down about 1/4 inch from the edge.
Make a tick mark at 1 1/2 inches and at 4 inches. Then draw a line connecting both tick marks. 

This what your folded bag topper should look like. 

Next grab your trimmer or scissors and cut where the tick marks are and where the connecting line is.

This how your bag topper should look now. with a little notch on the folded end. 

Next to cut the excess off place your topper over the handles and mark where the bag ends and cut the excess off. 

Now your bag topper is finished. 

Next you can decorate the bag any way you would like. 
For my bag I fussy cut out one of the flower images and this oval image as I really liked it. 
I added some rub ons to the white inside of the oval and the rub on words "You are a Delight". 
I also covered the bag topper with pattern paper. For more details you can view the video tutorial listed above. 


BAG 3

Bagg 3 is really simple bag and takes no time at all. Cut three banners, the pattern paper measures 2 1/4 x 6 1/2 inches; green cardstock at 2 x 5 1/2 inches; kraft paper from my stash 2 1/4 x 4 inches. Cut notches at the end of each one. 

For the pattern paper and green cardstock banner I adhered down. For the Kraft banner I added some rub ons around this one and the word "Enjoy".  Once I was finished I adhered it on top of the green banner. 

I did create a little tag for this bag. I covered the entire tag and punches two holes side by side and used three piece s of twine to tie a bow. I tied the tag onto the bag handle. For more details you can view the video tutorial on how I created this bag & tag. 

Here are the finished Gift Bags using this months Card, Tag and More Kit. 


Thank you so much for joining me today. I hope you received from inspiration from todays project share. I have link below for this fun Card, Tag & More Kit for you. 

Happy Crafting
Debbie 

November Card, Tag & More Kit - https://tresjoliekits.com/collections/card-kit/products/cards-tags-and-more-kits-2023?variant=42741347287226


All the designers will be revealing their projects on the Tres Jolie blog all month long. Make sure you join us for tons of inspiration, including video and photo tutorials. Also make sure you check out our newest chipboard designs that were just added to the store.

Sunday, July 23, 2023

Simple Vintage Essential Cards for Tres Jolie

 Hi everybody,

I hope you all are doing good this Sunday Morning. Today I am happy to share with some easy cards but with some really fun techniques you can do that make your cards look fantastic. 

Here is the step-by-step video tutorial I did in case you want to follow along and see more details.

To create these cards I used scraps from the Simple Stories Simple Vintage Essential Collection along with the some of of the elements inside the Scrapbooking Kit Club for July.

I did 2 cards for you today so let's start with the beautiful Celebrate card. The first card you will need a piece of your pattern paper measuring at 7 3/4 x 4 3/4 inches and your second piece of pattern pattern paper measures at 3 3/4 x 41/2 inches. Below is a photo of what you'll to create this card. 

Next you're gonna fold the large piece measuring 7 3/4 x 4 3/4 inches in half this is your base card. I distressed the light light brown piece of paper and inked the edges of all my pieces for this card using black ink and vintage photo distress ink. For the book page piece I tore the edges, lightly sprayed with water and crumpled up and inked with vintage photo ink. Once you adhere down you use your fingers to rub off some of the paper on the right side edges and down at the bottom to create a worn look. Take your ink and rub some ink on the edges lightly. 

Next we use our rub on numbers on the right hand side.

Next we peel off the numbers carefully and add adhere an ephemera piece from the paper collection kit. 

Next we add our flowers and layer them one on top of the other one. I did cut the leaves off and adhered them around the flowers. I added the sentiment across the top of the flowers. 

Card #2. 

We start off with black cardstock measuring 8 1/2 x 7 inches fold in half. The pattern paper is from the scrap pile and measures 4 x 6 3/4 inches. In the photo below I am distressing the sides and inked the edges with black ink.

After inking the edges fold pattern paper in half and in the middle where the fold is cut down 2 1/4 inches. I also added doily that is cut in half and inked. 

Once this is cut roll the flaps down ( as shown below) you can use a pencil or pen to help get the paper started to roll. 

Next adhere the pattern paper down to card base. Place the doily inside the card on the left side. Adhere down the flaps. (as shown below)

We are gonna start on our chipboard clock found inside the July Scrapbook Kit. First we gesso the clock with clear gesso. Let dry for a bit.

Next I added a few drops of the Botanical Stain Woad Blue to the chipboard clock, then added Tumble Glass Distress Ink and added more of the Woad Blue on top of that. I mixed around with the fingers and added some the Marigold Botanical Stain and last added just a few tiny drops of the Black Bean. These Botanical Stains can be found in the Mixed Media Kit for July. I really like how the clock turned out it had a bit of a green blue tint which was so pretty. 

Applied Marigold Botanical Stain.

Applied Black Bean Botanical Stain 

Here is the finished clock. I did go around the numerals with a black pen to make them a little darker. I added a clock arm from my stash. 

Next I placed the clock inside the card added the flower in the middle. 

I added the rest of the flowers and some ephemera pieces behind the flowers. The black piece from the ephemera packet I placed foam tape behind so it would add bit of a lift so it wouldn't look so flat. I then found an ephemera piece and stamped "To Someone Special" on it. 

Placed some foam tape on this sentiment I stamped and adhered down. 

Here are both cards we created using the July Scrapbook Kit. I just love how they turned out. 

Thank you all for joining me today. Please take a look at the video tutorial above for any further instructions. Head over to the Tres Jolie Store to look at this months Kits. I have all of the information below for you to join us on our social media. 

Take care

~ Debbie


Tres Jolie can also be found at:

Tres Jolie Facebook

Tres Jolie TikTok

Tres Jolie Instagram

Tres Jolie Website

Tres Jolie Subscriptions

Tres Jolie Blog

Tres Jolie YouTube

Tres Jolie Pinterest