Followers

Showing posts with label fall cards. Show all posts

Sunday, October 13, 2024

Amazing Autumn Cards

 Hi Crafty Peeps, 

I am so happy to be here with y'all again. Today I am sharing a few amazing techniques you can use with October Mixed Media Kit from Tres Jolie, along with using some of the Laser Cut Elements from the October Scrapbook Kit. I did a beautiful Fall Wreath last week and this week we are creating some fun cards using these Little Birdie Alcohol Inks. I have a step by step tutorial below along with a video tutorial and the links for your to grab your Mixed Media Kit before they are gone. 


 October Mixed Media Kit

I will be sharing two card on here but if you would like to see the video tutorial I do share how to create a third card using a technique that is similar to this stencil technique. 

To start this stencil technique place a stencil on your photo paper or you can use yupo paper. You need a paper that is non-porous. I use a paper that I've had in my stash for a long time, that I acquired from stamp'in up. It just like photo paper. 


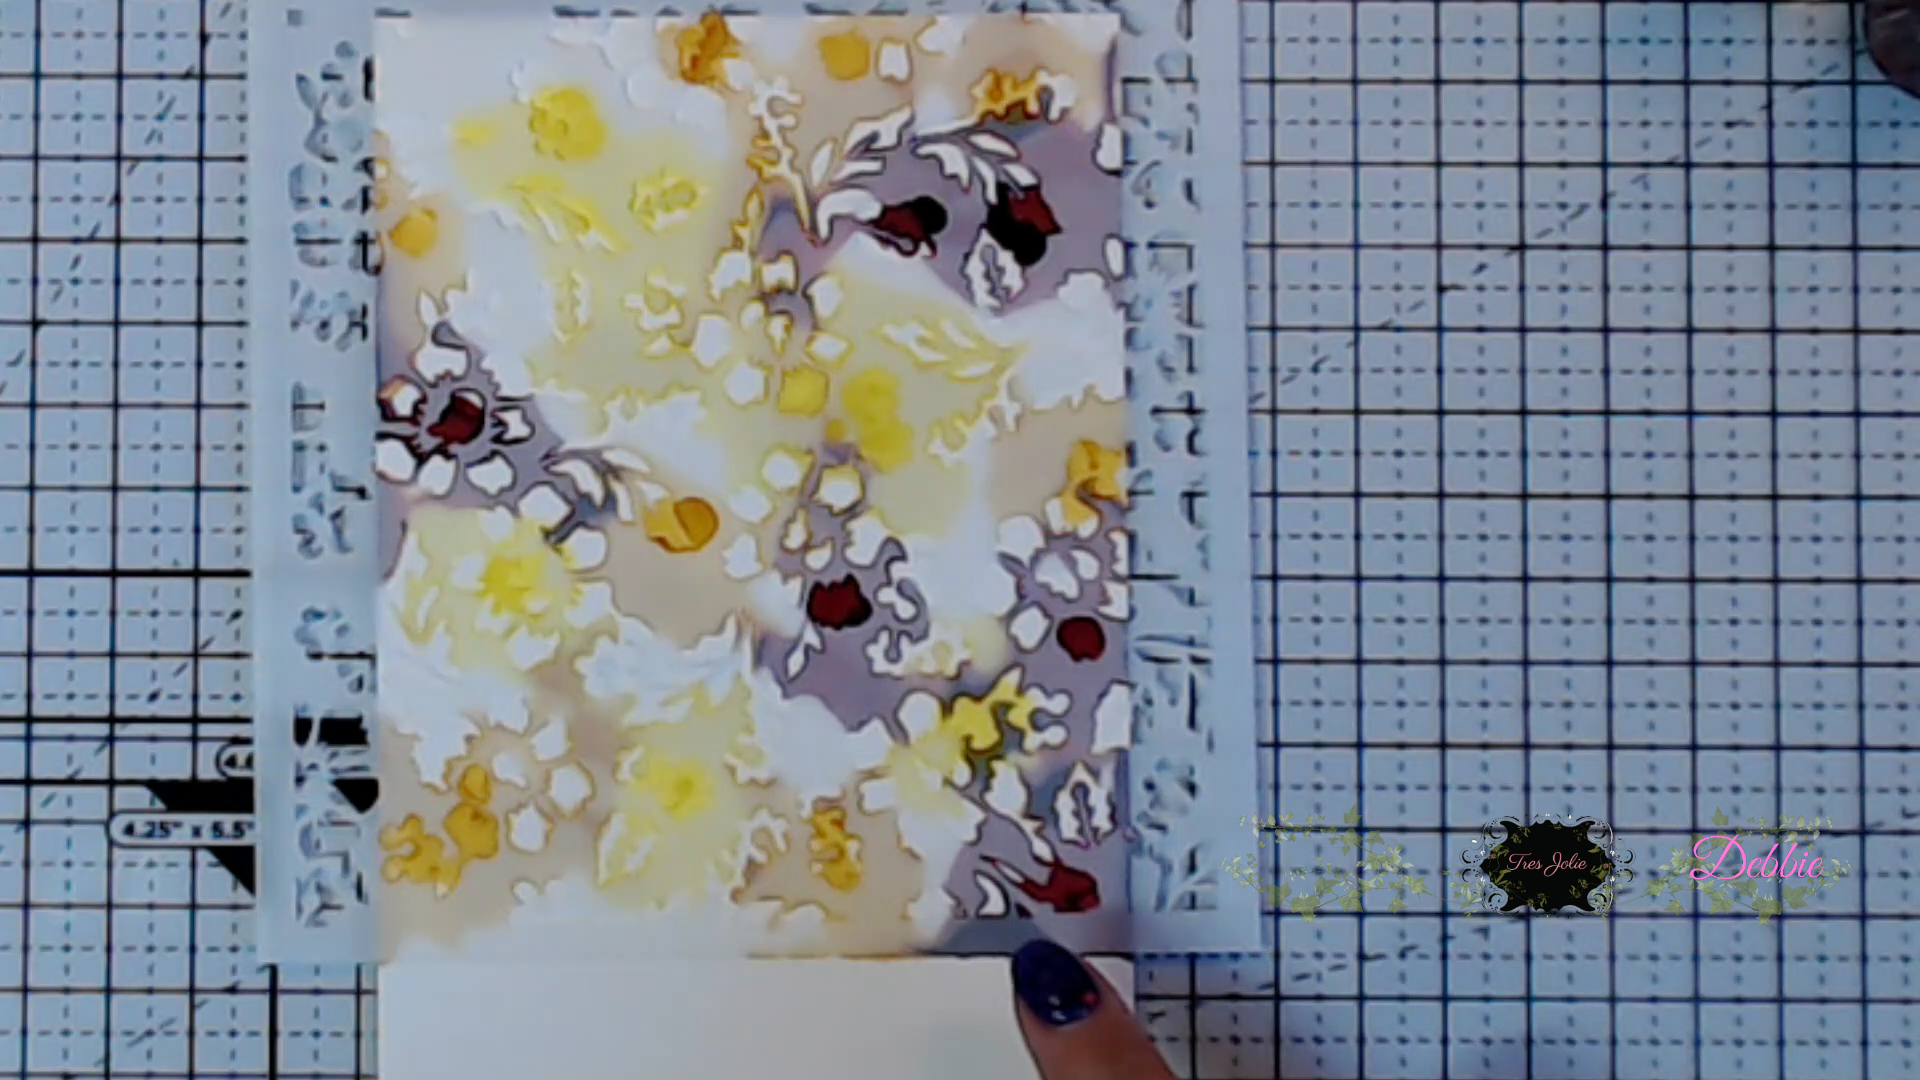
Next place your alcohol ink colors in various areas around your stencil. The alcohol ink will run underneath the stencil but that is okay, that is what we want. Here you can see the yellow alcohol ink running underneath the stencil leaving the open space of the stencil opened. It's basically giving us the negative of the stencil print. 


Here is what is looks like after I added some other colors of alcohol inks. Now let this dry for about 30-45 minutes, or you can dry with your heat tool but be careful not to over heat. 


Here is what mine looked like with I was finished. You can see some of the leaves and flowers. This is a wonderful way to get a use out of those stencils from Mixed Media Kits from Tres Jolie. 
And the backgrounds for your cards will look amazing. 


Next we are going to do another fun technique using a straw. I placed some color down on my paper and then added some drops of the blue velvet color down.


Next I used my straw to blow outward away from me to create these fun splatter effects and look one on the left side looks like a butterfly. lol 
I thought this would be a fun way to create some great backgrounds for your cards. You can get many different patterns by using this fun straw technique and when turning the card around you can add more inks and use the straw. 


Look how fun this splatter background looks. 


Here is the stencil technique card all done and decorated using the Vintage Orchard Laser Cut Elements. I just love how this background looks. I will definitely be making more of these using many of my other stencils. 

Here is the straw technique card all decorated using some of the Laser Cut Elements as well, along with some of the flowers from the Scrapbook Kit. I just love how this turned out. 


I hope you enjoyed today's step by step tutorial, remember I have the video tutorial for your convenience. 

These cards turned out fantastic using some really fun techniques that are quick and easy to do and you can create cards fast. Remember your inks are fast drying so you don't have to wait very long for them to dry if using by themselves like with the straw technique, with the stencil technique you can cut out papers and do other things while you are waiting for the inks to dry under the stencil but it doesn't take long. I hope you got some great ideas and inspiration from today's crafty post. 

 Don't forget to post your project on our Facebook Group Page, link is down below.
 For more details you can always view the video tutorial process, which is at the top of the page. 
Thanks again for joining me, I have all the links listed for you throughout the post so just click on the words and you will be taken directly to the store. 

Wishing you all a great day and Happy Crafting. 


Wednesday, November 15, 2023

Simple Hello Fall Cards

 Hello everyone, 

Hope you are having a great day. With Fall in air I couldn't help but create a few simple cards using a few items from Clear Scraps. 


Here are a few items I used. 

2 white 8 1/2 x 11 white cardstock; hello Fall Stencil; Vine Circle Chipboard Embellishment


Additional items from my stash

To get started cut 1 piece of cardstock at 11x5 inches score at 5 1/2 inches & 2 1/2 inches. 


Cut 2nd piece of cardstock at 5x5 1/2 inches. 

Next I placed the hello Fall stencil on a piece of pattern paper and placed the circle vine on top so I knew where I wanted to stencil the hello and make sure I wasn't to far over on either side. I used distress ink ground espresso.

After stenciling I decided to ink up the Vine Circle Chipboard piece, using the colors that were in the paper collection I used. 


Before adhering the Vine Circle Chipboard I did emboss it with clear embossing powder. 


Now I covering the front of the card using the cardstock piece measuring 5x51/2 inches.

I added patten paper to the top and bottom, because I had cut the hexagon around its edges. 

I adhered on the pattern papers and the hello stenciled piece. I added glue to the back of the Circle Vine Chipboard piece to place over the hello piece.


Add glue to the right side portion of the card you scored. (see below)

Adhere your front card piece to the adhesive/glue. Burnish your card front down. 


Next we take the hello FALL stencil and place it on a wooden pattern paper. 
I used distress ink ground espresso.

Here is what it looked it once I finished. 

So the FALL was a bit large for the card, so I decided to fussy cut the letters out. 

Once I cut them all out I placed foam tape on the back of each one. 

Next I placed in a staggered look to have them fit nicely. I think it gave a nice fun look to the card. 

Here is what the finished card looks like all done. 


This next card was created with the scrap piece from the card we just did, measures 3 1/2 x 11 inches, score down the middle. I used the Simple Stories falling leave stencil and the small circle with the same color of inks used on the large Circle Vine. 
The small circle is the inner piece that came from the Vine Circle Chipboard piece. I added flowers in the center. 
On the bottom left hand side I stenciled hello using the Clear Scraps hello FALL stencil. I just love this stencil it's so versatile. I hope you like it too. 


Here are both cards finished using the Clear Scraps hello Fall Stencil and the Vine Circle Chipboard Embellishment 

Thanks for joining me today I hope you got some inspiration from these beautiful cards using the hello FALL stencil and the Vine Circle Chipboard. 
Have a great day and Happy Crafting 
Debbie Adams