Followers

Showing posts with label Gift Bag. Show all posts

Thursday, August 22, 2024

Interactive Mom Birthday Card and Gift Bag

 Hi all, 

Hi everyone, Today's tutorial is a bit different as I'm sharing a gift bag and a unique interactive birthday card I created for my daughters birthday. My granddaughter had asked me to create a card she had seen on a video and so we worked on this card together. I hope you enjoy todays video. The music that goes to this is by Meghan Trainor named Mom. It is a super cute song. You can check my video tutorial for more details.


To get started on the gift bag, I just took a bag I had in my stash  and now we are going to alter it with the items from the Scrapbooking kit. The bag is from shopping at Parks Coffee, if you've not tried their coffee it's really good. lol  Cut you paper down to the size of the bag you have unless you would like a border, I left a 1/8 inch border. I distressed the edges of my pattern paper and then adhered on top of the bag. And now you can decorate.


Here is how I decorated the front of my bag. I fussy cut out the words and birthday banner from the paper collection. I adhered some faux flowers from my stash and the butterflies. I added more items later.


Now for the Birthday Card. 
For the card base you will cut one piece at 6 inches (not 6 1/2) by 8 1/2 inches, score 1/2 inch on left side of the 6 inch across the scoreboard. Fold one piece of 8 1/2 x 11 inch cardstock in half. 


Next adhere the 6 x 8 1/2 inch piece inside the card. Placing adhesive to the 1/2 inch scored piece.


Next I used oxide inks on the flower pattern paper, as shown below, inking the paper with colors that coordinated with the paper.


I then added the flowers I fussy cut from the paper collection and added the birthday sentiment, along with some other items from my stash. 


Here is the front of the card decorated. 


Now for the inside portion of this card. The words are lyrics to a song by Meghan Trainor named Mom. It is a cute song. My granddaughter saw a video and asked me if I would help her create the card she saw in the video. So I typed out a few of the lyrics and printed them out and then cut them. 
On the right hand page we created a  little bomb that opens up and pulls back together, and the hand page has a heart that lifts upwards. You can see more details on the video on how I created these pages.


On the next page we had to create a slider. So I cut a piece of paper of that is 3 1/2 x 5 inches and in the middle I traced a 1x 4 1/4 inch area to cut out as this will be a window. 
After cutting out the window place foam tap on the back 


Next cut out a strip that is 1 1/4 x 5 1/4 inches to slide in and out of the window. Next add some foam tape to end of the strip on the left side and add a flower or an image this will be the stopper when you slide it over. You can view more details on my video tutorial.  


Next I arranged the remailing words and added some ephemera from the card kit and adhered down my words above the slider.
The last page we added a little flap with the remaining words and adhered a photo of my granddaughter with my daughter underneath. 


Here is what both finished items look like. I really like this paper collection as the paper has some beautiful colors and perfect for backgrounds for this card or any card. Both of these just turned out nice and my daughter just loved her card and the gift bag. 


I hope you enjoyed today's step by step tutorial, remember I have the video tutorial for your convenience. I had a great time using this months August Scrapbook Kit, you really get a ton of fun crafty stuff inside. I am really pleased on how the card turned out and the  beautiful gift bag brings a smile to anyone's face when receiving a gift from you.  I hope you felt inspired to create an altered gift bag or birthday card using this month August Scrapbook Kit. 

Don't forget to post your project on our Facebook Group Page, link is down below.
 For more details you can always view the video tutorial process, which is at the top of the page. 
Thanks again for joining me, I have all the links listed for you throughout the post so just click on the words and you will be taken directly to the store. 

Wishing you all a great day and Happy Crafting. 


Thursday, November 9, 2023

Beautiful Gift Bags using the Card, Tag & More Kit

 Hi everyone 

I am excited to share my Gift Bags with you today using the November Card, Tag & More Kit from Tres Jolie. This months kit is just awesome because you can decorate these bags for any special occasion you have coming up or place them in your stash until you are ready to use them. I have a video tutorial to share I created each gift bag. 


Here are the supplies you will need from the Card Kit. So let's get started. 


BAG 1

Cut two pieces of the green cardstock one for the front and one for back. Measuring 5 x 7 3/4 inches. Do not adhere yet.  

Score both pieces of cardstock at 1 1/2 inches. 

Next adhere both pieces of green cardstock down to the paper bag and adhere down your pattern paper on top. 

Next I chose a piece of the pattern paper from the kit with an image on it and used the 49 and Market Rub ons from the kit. I rubbed on the word "Enjoy" on top of the image. 

Here is what the image looked like after I finished rubbing it on. The rub ons are so simple to use and I like the variety of fonts they come in, they really add a nice touch to the the project. 

Next I inked up one of the chipboard pieces from the kit, these are so pretty. I used the Distress Ink ground expresso that comes in the kit to ink up the chipboard piece. 

Next place glue on top of the chipboard.

And add glitter to the chipboard piece. You can use any glitter you have in your stash. I used Distress Glitter Brushed Corduroy.

Next I adhered down the chipboard to the left hand side of the bag and I placed down my flowers from 49 and Market. These flowers come in your kit and are so cute & dainty

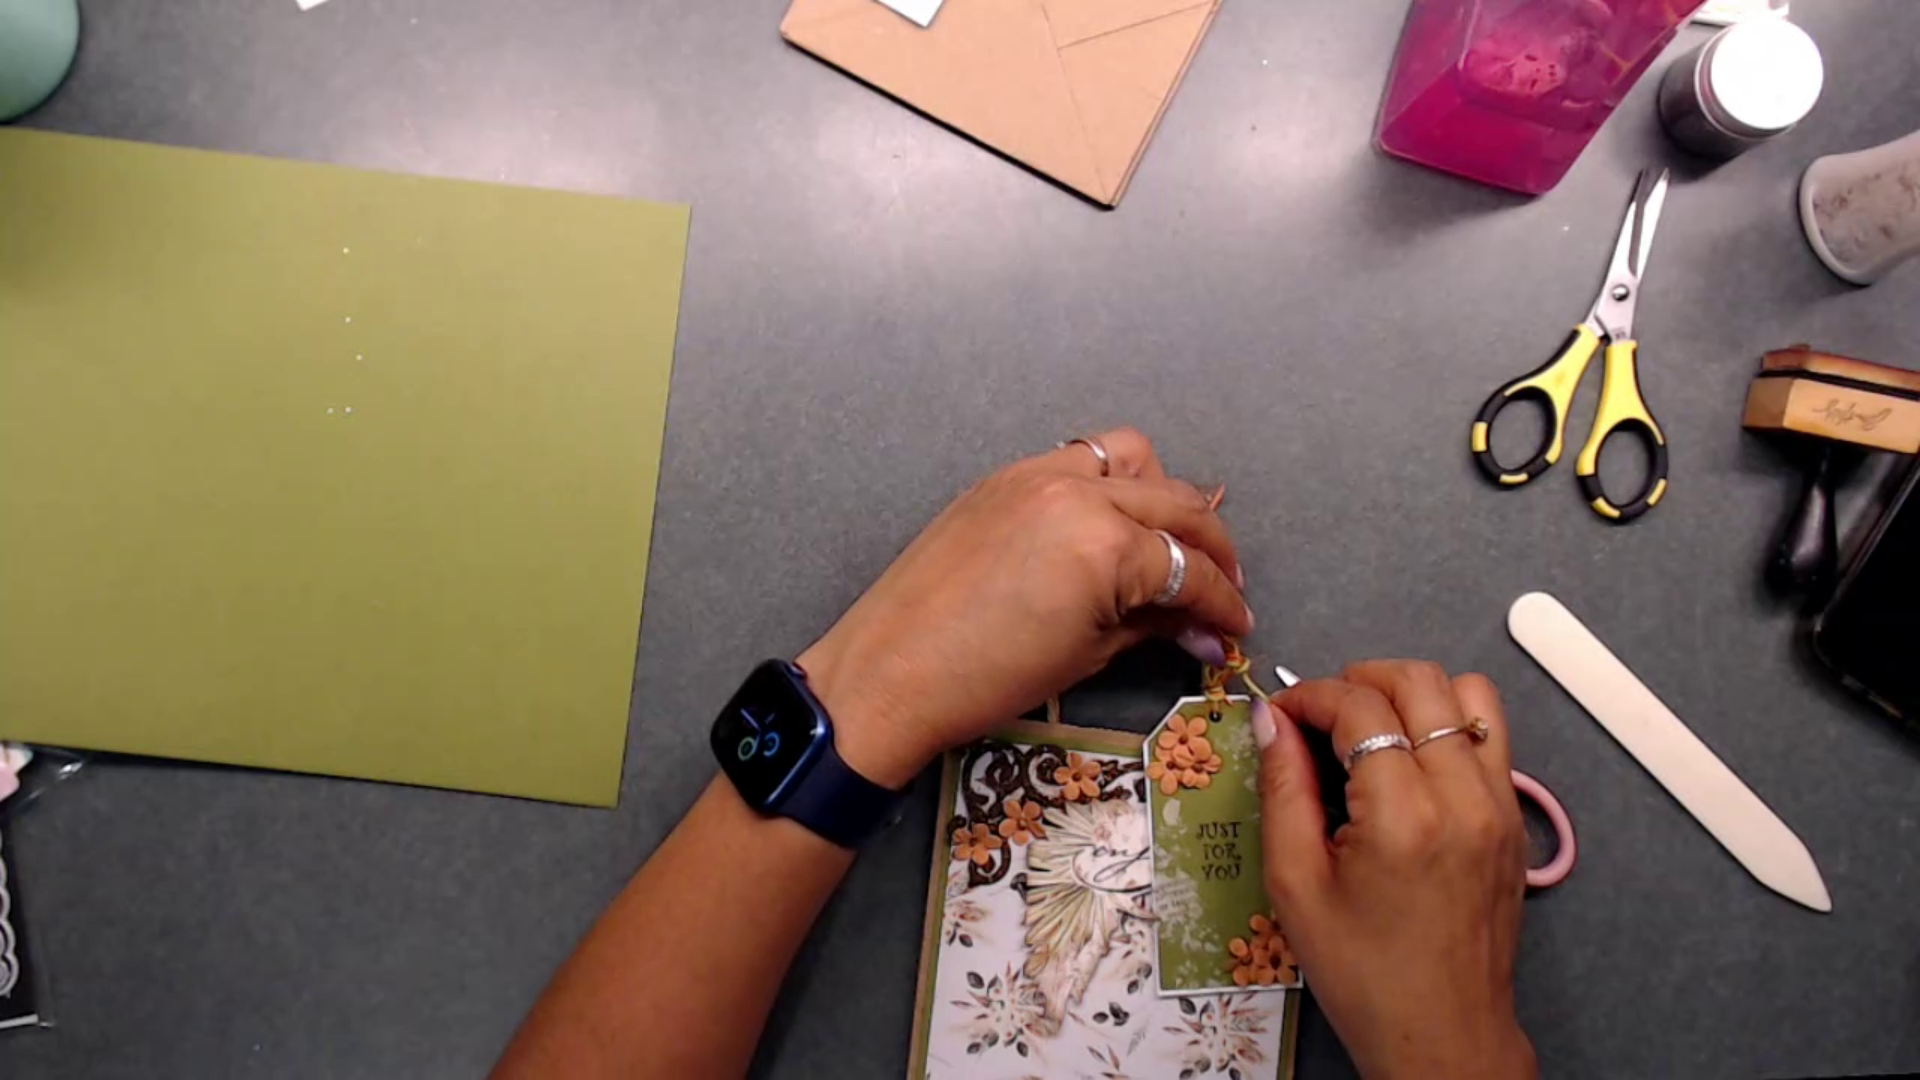
Next I tied on my tag to the handle of the bag I did use some rub ons on the tag and stamped "just for you" with a stamp from my stash. I also adhered some flowers in the upper left corner and in the bottom right corner. 


BAG 2

For Bag 2 - cut a strip green cardstock at 4 inches. And score at 2 inches

Next line your ruler up to the folder part of the strip and come down about 1/4 inch from the edge.
Make a tick mark at 1 1/2 inches and at 4 inches. Then draw a line connecting both tick marks. 

This what your folded bag topper should look like. 

Next grab your trimmer or scissors and cut where the tick marks are and where the connecting line is.

This how your bag topper should look now. with a little notch on the folded end. 

Next to cut the excess off place your topper over the handles and mark where the bag ends and cut the excess off. 

Now your bag topper is finished. 

Next you can decorate the bag any way you would like. 
For my bag I fussy cut out one of the flower images and this oval image as I really liked it. 
I added some rub ons to the white inside of the oval and the rub on words "You are a Delight". 
I also covered the bag topper with pattern paper. For more details you can view the video tutorial listed above. 


BAG 3

Bagg 3 is really simple bag and takes no time at all. Cut three banners, the pattern paper measures 2 1/4 x 6 1/2 inches; green cardstock at 2 x 5 1/2 inches; kraft paper from my stash 2 1/4 x 4 inches. Cut notches at the end of each one. 

For the pattern paper and green cardstock banner I adhered down. For the Kraft banner I added some rub ons around this one and the word "Enjoy".  Once I was finished I adhered it on top of the green banner. 

I did create a little tag for this bag. I covered the entire tag and punches two holes side by side and used three piece s of twine to tie a bow. I tied the tag onto the bag handle. For more details you can view the video tutorial on how I created this bag & tag. 

Here are the finished Gift Bags using this months Card, Tag and More Kit. 


Thank you so much for joining me today. I hope you received from inspiration from todays project share. I have link below for this fun Card, Tag & More Kit for you. 

Happy Crafting
Debbie 

November Card, Tag & More Kit - https://tresjoliekits.com/collections/card-kit/products/cards-tags-and-more-kits-2023?variant=42741347287226


All the designers will be revealing their projects on the Tres Jolie blog all month long. Make sure you join us for tons of inspiration, including video and photo tutorials. Also make sure you check out our newest chipboard designs that were just added to the store.

Tuesday, October 13, 2020

Happy Halloween with Retro Bows

 Hi all,

Sorry I am a little late posting my project for the new challenge at International Art & Soul. 

I was on a mini vacation with hubby and planned to have this post done before we returned but had to cut it short due to my father in-law not doing very well. So right now we are with family and will be here for a while. 

Our new challenge theme is - Halloween, so please join us and show us your fun and creative Halloween projects. 

For my project I created a few Halloween Bows with Retro Halloween Digital Paper. The digital paper is from (Click names to connect to store) Taylorcardmade4u, 9 Retro Digital Images &  Halloween Retro set 2 both of these are so awesome if you like the vintage Halloween images from the past. I also used some bag topper metal dies and Bow metal dies to create the bows, both of these dies are so easy to use. 

In creating these bows I used an old Halloween paper from Authentique for the bag toppers, bows and the background paper of the bows.  I decreased the size of Retro Halloween images so I could place them in the middle of each bow and fussy cut them. I them used glossy accents on top of each image to make it shiny. These were a give away prize for one lucky winner from my Halloween YouTube Hop I participated in a few weeks ago.


Challenges Entered:

Products Used:

Esculpido Bag Handle Dies 


6pcs/packs Bow metal cutting dies


Thank you for joining me today. I hope you get a chance to play along with for our fun Halloween Challenge at International Art & Soul. 

Happy Crafting
~Deb 


Sunday, August 7, 2016

Back to School Treat Bag


Hey Y'all,

I hope you all are having a wonderful weekend. Today we are starting a new challenge at One Stitch At A Time - Anything Goes with Boxes and Bags. I invite you over to join in this fun challenge. You gotta make a box or bag and I would love to see your fabulous creations.

For this challenge I created a fun back to school treat bag using an image for the StitchyBear Digi Outlet Shop made by BBKakes - School 3 Frame. I thought it would be prefect for a back to school gift for a teacher. I filled the bag with little coffee candies, but I think chocolate would work too. lol

Hope you all like this and are inspired to create your own little bag for a back to school gift for a teach or two.
For this bag I used School 3 Frame by BBKakes.
I used Graphic 45 - An ABC Primer paper collection
I thought it would be perfect with the school image from 
the StitchyBear Digi Outlet Shop.  I used a couple of chipboard items
from the ABC Primer set. 

Here is a close up of the image I colored with
TH distressed markers. I used my copic markers
on the little apple. 
Supplies:
Ink: TH markers and distress inks tea dye
Paper: Graphic 45 An ABC Primer
Accessores: acetate used for window in box; seam binding, red twine, and chipboard pieces; used a boarder punch from MS. 

Challenges I entered:

Thank you all for stopping by today, I hope you were inspired and please join us for theis fun challenge them. 
Wishing you all a beautiful Sunday, 
Hugs, Deborah xxx

Friday, August 5, 2016

A Christmas Bag

Hi all,

Yep, It's Friday!!! Whoot, Whoot!! Hope you are having a great day. Today at Really Reasonable Ribbon it's a new challenge - Anything but a card.
So I want to invite you all to join us for some fun! You can create anything you'd like and upload it to the challenge - anything but a card. okay

So for my project, I chose to make a gift bag. It actually made from an envelope regular letter size envelop. I had did a tutorial a while ago on how to make one. I will post it below, in case you want to make one.

So here is my gift bag -
For this little gift bag I used Really Reasonable Ribbon 
Organza sheer ribbon in red & white. It was just the perfect match 
with this Graphic 45 Twas the Night Before Christmas paper collection.
I have some great close ups for you. 


Here is a close up showing how I took both ribbons and intertwined them 
together just a little twisting. I then took a brad put it through both of the ribbons 
and punched the brad through both sides of the bag. 

This photo shows you a close up of the red ribbon attached 
along the top edge. I did got all the way around using my Art Glitter Glue
as the adhesive to attach my ribbons and flowers
The red rose is from Really Reasonable Ribbon - Wild Orchid 

 Here is a close up of the bottom of the ribbon, it wraps around the bottom of 
the envelope. I also fussy cut the images from the paper collection. I just love
this paper collection so perfect for these ribbons. 
Here is my YouTube on how to make the envelop bag
https://www.youtube.com/watch?v=QzJhAXMoy9g

Supplies:
Paper - Graphic 45 - Twas the Night Before Christmas; 
Inks: TH inks - Festive Berries
Accessories: 2 brads from my stash; envelope

Challenges entered:

Thank you all so much for stopping by I appreciate all the wonderful comments you leave. I invite you all to join our FUN challenge, this is gonna be great to see everyone's creations and get some wonderful inspiration! :D 
Wishing you all a great weekend
Hugs, 
Deborah xxx

Sunday, February 15, 2015

Simple Envelope Gift Bag

Hi All,

Today I am sharing with you a tutorial I posted to Crafty Sentiments Designs Inspirational Blog. Here is a tutorial for you on how to make a simple small gift bag for little treats or little gift items. Grab your cup of tea, coffee, or soda cause there are a lot of pictures. So sit back and relax.

I made this little gift bag for Valentine's Day. I learned of this idea years ago from a Stamp'in Up event. It really works for any occasion and with any type of envelope.

Supplies needed:

  1. Stamp - Crafty Sentiments - I used Annabel- Elegance from Crafty Sentiments Designs shop
  2. Any size envelope (Depending on the size of envelope - using a larger size you will need to increase the score marks from 1/2 inch to 1 inch. 
  3. Scoring tools
  4. Decorative edge/border punches, dies or scissors
  5. Inks, markers or colored pencils
  6. Any type of embellishments you want to use
  7. Note: I used Ribbon for my handle and attached with small brads on the sides. You can use anything you would like to make your handle. :D 
Here's the Tutorial:
****Adhere your envelope before starting****


Used Red Ribbon as the handle for the bag
Supplies:
Stamp- Crafty Sentiments - Annabel- Elegance
Inks- Copics ; Momento - Love Letter
Paper - Recollection - Red ; DCWV - Foil paper silver
Accessories - Punches - sm. flower punch; Fiskars border punch; Cricut - Heart from Love Struck Cartridge (found on DS)
From Stash - 1-standard white envelope; Red Ribbon, heart brads, wooden Love; pearls, Doily; Liquid Pearls on dress- white; black glitter stickers- XO;


Challenges entered:
Sassy Studio Designs: DTBST #268 Happy Valentine's Day
CardzTV: Cardz TV 3-D Designer's Challenge "Valentine's Treat"
4Crafty Chicks: Valentine's #233
Little Miss Muffet Challenges: Challenge #104-Anything Goes
Scrap&Craft: Challenge #2 - Valentine's/Love/Romance
Craft Hoarders Anonymous Challenge Blog - February Challenge - How I Love Thee
Fussy and Fancy Friday Challenge - Fussy and Fancy Challenge #132 - "It's All About Love"
Sister Act Challenge: Challenge #93
Simply Create Too: Challenge #79 "Anything Goes"
Jo's Scrap Shack - : FFC#75 "Valentine's Day"
Friday Coloring Challenge - February 13th - February 19th - The Outlawz Challenge "Have A Heart"
Jellypark Challenges: Jellypark Friends February Challenge- "Love is in the Air"

Well there you go, hope you enjoyed the tutorial and get a chance to try out this project. Thank you for stopping by and hope you all have a wonderful day.
Hugs~
Deborah :D