I have a fun and simple canvas design for you today. We are using the July 2025 Mixed Media Kit. Creating this canvas was so relaxing, definitely had fun playing around with the mixed media products. I have a step by step down below as well as the video tutorial which has some bonus tips inside. Have fun and enjoy. Links are down below.
July 2025 Mixed Media Kit
To get started I used a paint brush to place down my mod Podge only on half of the canvas at a time. Be sure to burnish down once you have one side done and then the other side.
After adhering on the rice paper place a little bit of water on the edges of the excess to tear off the rice paper. **view video tutorial**
Next add some clear gesso down on the rice paper to prepare for the Jewel effect paste from the Mixed Media Kit.
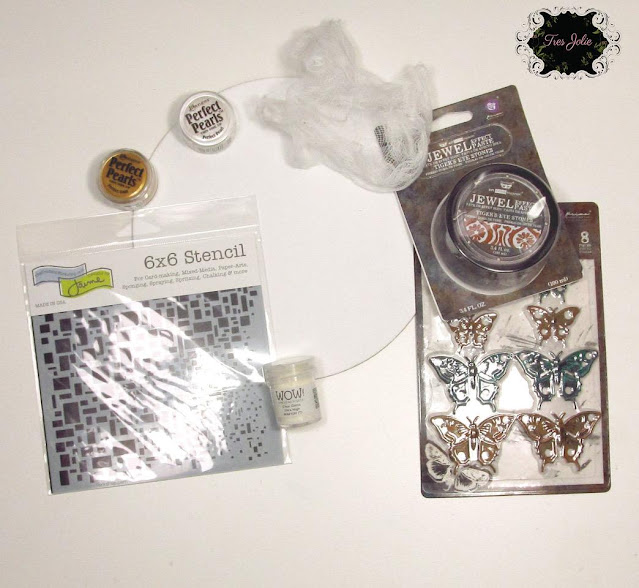
So to add a bit of fun I cut a little piece of cheesecloth and placed it in a small cut with a bit of gold perfect pearls and water. Mix a little and set aside for 1-2 minutes.
Next take out the cheesecloth and airdry or you can use your heat tool to dry quickly.
Next I adhered down the cheesecloth around the edges and up onto the canvas area.
**view video tutorial for more details**
After adhering down the cheesecloth I then used the stencil and Tiger's eye stones Jewel Effect Paste to add a bit of texture to the canvas.
I decided use the torn off portion from the rice paper and adhere to a paper frame from May 2025 Scrapbook Kit. These frames are amazing.
Here is the finished canvas I added the mechanical Butterflies from the MM Kit and I used some flowers along with some sentiments from the Finnabair Sentiment Booklet from a previous kit.
I hope you enjoyed today's step by step tutorial and are inspired to create a Mixed Media Canvas from the July 2025 Mixed Media Kit. I like the spent playing with the kits as you can be as creative as you want to be. I would love to see what you create with this Mixed Media Kit or anything you have created.
I invite you to please stop by our Facebook page to see what new items our design team has created using our monthly kits.
You can always post your projects on Tres Jolie FB page - Tres Jolie Club Cafe.
Don't forget to post your project on our Facebook Group Page, link is down below.
We would love to see what you create.
For more details you can always view the video tutorial process, which is at the top of the page.
Thanks again for joining me, I have all the links listed for you throughout the post so just click on the words and you will be taken directly to the store.
Enjoy and Happy Crafting.
Don’t forget to follow us on all our social media:
I am so excited to share a fun project using the March 2025 Mixed Media Kit along with the Card, Tag and More Kit. Mixing both of these kits together for this fun Decorative Not Pad Holder just came together perfectly. I have a step by step tutorial below along with the video tutorial that gives a bit more details. Links are throughout the blog post and I have photos of the kits just click on the links to be directed to the Tres Jolie Shop.
To start our project open the clay package and the mould. Roll out the clay and place inside the mould. Be sure to make your edges flat against the sides of mould.
While the clay dries and forms lets add our paper to the large door tag/hanger. I used the 3D Gel from January Mixed Media Kit. This 3D Gel is like an adhesive, so I tore my scraps, laid them down over lapping them a bit and gluing them down.
Here is what the finished door hanger looks like after I adhered all the papers down. I also covered the back. To get the edges smooth you can use a nail file around the edges and inside the hole.
Next I used the blue shimmer powder, add a bit of water and mix. I then brushed on the blue shimmer over the areas where the torn edges meet on top of one another. After applying the water color you can dry using the heat gun. I also used the Gold paint from the Mixed Media Kit to paint the edges of the door hanger.
Once the clay was a bit dry I took out the images and painted using both the blue shimmer paint and the gold.
Next I cut the frame in half and adhered part of the frame to top of the tag, as shown below. Adhere it using wet adhesive. I used the 3D Gel. I adhered the other half of the frame down below, including the tea cup, bow and the small little medallion.
Next I added the little strap that wraps around the front to the back. (see video for more details).
Slip in the back part of your note pad.
Here's what the bottom looks like with the other half of the frame.
Here is the finished Decorative Not Pad Holder. I added magnets to the back so I could place on my refrigerator. You will need strong magnets so it will not slide down the frig. You can use a small note pad as shown below or you can use a small spiral note pad as well.
I hope you enjoyed today's step by step tutorial. I loved how this project turned out and it only took an hour to create it. Definitely a quick and easy project. You can give this as gift or use it for yourself.
Don't forget to post your project on our Facebook Group Page, link is down below. We would love to see what you create.
For more details you can always view the video tutorial process, which is at the top of the page.
Thanks again for joining me, I have all the links listed for you throughout the post so just click on the words and you will be taken directly to the store.
Wishing you all a great day and Happy Crafting.
Don’t forget to follow us on all our social media:
Thank for joining me today. I have created a fun project today that is super easy and you'll like using the January Mixed Kit along with the Scrapbook Kit. I hope today's project inspires you. Also remember if you ever create any projects you want to share you can always join us on our FaceBook Page Tres Jolie Kit Club Cafe, here you can find more inspiration and post what you've created. I also have links throughout the post here for you, just click on them and you'll go directly to the product.
As always I have some step by step tutorial below, but for more details please refer to the video tutorial.
January 2025 Mixed Media Kit January 2025 Scrapbook Ki
Today we are going to create a mixed media journal page.
To start I placed some white gesso on top of the page and spread this using the paint brush from the Mixed Media Kit.
After the white gesso dries, To start I added in white gesso to the acrylic violet paint by Finnabair and the Lindy's Gang Magical foxglove fuchsia, you'll want to mix, as shown below. Next I scrunched up a napkin, then dipped it in the purple and pounced the paint around the edge of the page. Next I used the Lindy's Gang Magical foxglove fuchsia and pounced it underneath the violet paint.
Next I used the background chipboard Brick Wall Panel and used the Glamour Gel and painted it all over the chipboard. Set aside to dry.
I did use black gesso along with the Finnabair manuscript stencil in a few areas on the page. I set aside to dry while I painted my chipboard pieces. Next I painted the (nature) flower chipboard piece with the brown Glamour Gel and applied lilac and violet gelatos on the flower petals.
Once the black gesso dried I cut the brick wall chipboard piece and used the 3D Gloss Gel to adhere to the art journal page.
Here are some photos of the finished art journal page. I really like how this turned out. I also added some glizy gold throughout the page. We used the flowers from the Scrapbook kit and I fussy cut out the butterflies and the kitten on the stack of books from the Scrapbook paper.
I also added some art stones and topped them off with some gold spritz, and I did black and white splatters to finish off the page.
Here are a few close ups of the page.
Here is a close up of the Brick Wall Chipboard. I just the speckles of gold with in the paint.
Creating the mixed media art journal page was so fun and combining the paints and placing the gold lines to create a marbling look makes it look so pretty with the pink and purple colors.
I like how the black stenciled words stick out amongst the bright colored flowers. The sentiment is from the sentiment booklet that comes in the Mix Media Kit.
I hope you enjoyed today's step by step tutorial. For more details you can view the video tutorial.
Don't forget to post your project on our Facebook Group Page, link is down below.
For more details you can always view the video tutorial process, which is at the top of the page.
Thanks again for joining me, I have all the links listed for you throughout the post so just click on the words and you will be taken directly to the store.
Wishing you all a great day and Happy Crafting.
Don’t forget to follow us on all our social media:
Thank for joining me today. Have you played around with this months Mixed Media Kit? I am enjoying playing around with the all the basic tools that are inside this kit. It's a great way to start out learning how all these fabulous items work together. I am still learning all about mixed media and with that being said, I have a fun layout I created using a new technique. I have a step by step down below for you but my video tutorial always gives you more details and you can follow both anytime. I also have links to the store for you grab your January Mixed Media Kit and the Scrapbook Kit.
January 2025 Mixed Media Kit January 2025 Scrapbook Kit
Let's get started - To start you are going to need some clear gesso. This is something that did not come in the kit so you will need to grab some from your stash. Then brush the clear gesso over one of the pattern papers from the Scrapbook Kit. I used my large art brush from the Mixed Media Kit to brush on the clear gesso.
While your pattern paper is drying brush on your heavy white gesso, let dry or dry with heat gun for a bit let sit and then add some textured paste on top. Again you can let dry or use the heat gun to dry for a bit. **make sure not to get your chipboard to hot**
Here is what the chipboard looks like with the heavy white gesso and texture paste.
Next I added a stencil in a few areas around my pattern paper. I used the stencil from the Feb. 2024 Mixed Media Kit. If you do not have that one use one from your stash. Spread your modeling paste around. Then I came in with a scrunched up paper towel and did a pouncing technique around the areas I stenciled.
Next you can add your paints. I used the June 2024 Mixed Media kit, using the Finnabair violet acrylic paint along with the french rose Couture Paint. Again when placing these down I did a light pouncing technique.
After I finished adding in the paint and let it dry for a bit I painted the frame with Finnabair violet paint. Then I tranced the frame onto one of the scrap pieces of pattern paper and cut out to place the photo of my parents in the middle. Next the bottom left and right corner pieces are images I fussy cut from some of the other pattern papers. I added in the ephemera pieces and also fussy cut out the butterflies and some of the flowers. I did add foam tape to the back of the flowers and to the bottom corner pieces.
I also added in the beautiful lace from the Scrapbook Kit. After adhering everything down I used some of the Glitzy Magical Gleaming Gold around the purple frame and around the layout.
To get more details on how I put my layout together you can hop on over to my video tutorial.
I hope you enjoyed today's step by step tutorial. I really had fun using the pouncing technique on this layout. I hope you received some inspiration and try creating a Mixed Media layout of one your favorite family photos. I hope to share some other fun techniques with you next week using this months January 2025 Mixed Media Kit. Thank you all for joining me today. For more details you can view the video tutorial.
Don't forget to post your project on our Facebook Group Page, link is down below.
For more details you can always view the video tutorial process, which is at the top of the page.
Thanks again for joining me, I have all the links listed for you throughout the post so just click on the words and you will be taken directly to the store.
Wishing you all a great day and Happy Crafting.
Don’t forget to follow us on all our social media:
Today I'm sharing this beautiful layout with you using box June Mixed Media Kit and Scrapbook Kit. I hope you enjoy today's step by step tutorial and I have a video tutorial of the Scrapbook Layout Process for your convenience as well. I have all the links down below for you.
To Start out I mixed the modeling paste with the acrylic paint Ochre. Then I added clear gesso to my 12x12 pattern paper. Once the gesso dried I placed the stencil down and spread the mixture on top of the 12x12 pattern paper. I spread the paste in various areas. Now put aside to dry or use your heat tool.
Next I painted the heart chipboard piece from the Scrapbook Kit using the Carmine acrylic paint from the Mixed Media Kit.
For this technique I chose a 12x12 paper with some images on them from the Scrapbook Kit and gently tore around them. I thought these two pieces were just beautiful.
After I finished tearing the images how I wanted I mixed the ochre acrylic paint with a bit of water and used my paint brush to gently paint along the edges of the torn images. For this technique you can use inks but I thought using the paint would be a nice touch.
Here is the finished layout. I added the "Memories Of You" sentiment from the ephemera pack, and adhered foam squares to each letter and finished off with some Glossy Accents. I also had fussy cut out the large butterfly from one of the 12x12 pattern papers to tuck it a bit under the photo mat, and adhered flowers on top of the butterfly. The chipboard heart I placed down below in the right hand corner.
I did use the stencil again to add some paste to the right side by the butterfly as the space seemed a bit empty. I hope you like today's Scrapbook Layout and you found some great inspiration
For more details you can always view the video tutorial process, which is at the top of the page.
Thanks again for joining me, I have all the links listed for you throughout the post so just click on the words and you will be taken directly to the store.
Wishing you all a great day and Happy Crafting.
Don’t forget to follow us on all our social media: