Hi everyone,
It's Deb here sharing a really easy project using the Tres Jolie July Card Tag and More Kit. I also brought a a few items from the Scrapbooking Kit. I hope you enjoy today's project. I have the step by step tutorial down below as well the video tutorial for you. I have the links and photos below for you to check out both kits, just click the link and it take you directly to the Tres Jolie Shop.
Card, Tag and More Kit Scrapbooking Kit
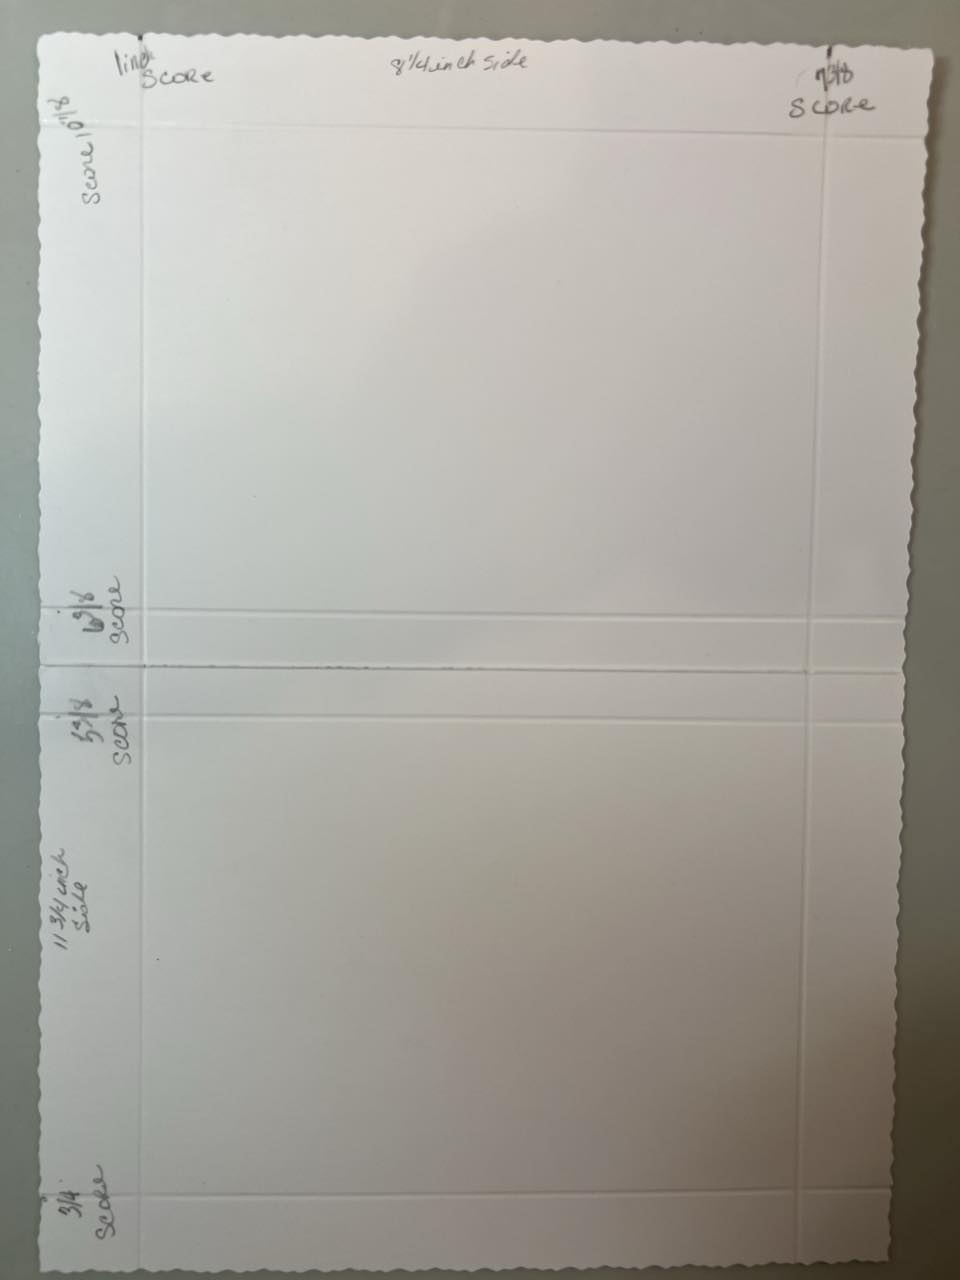
To start out you will use the largest card in the card kit. With the 11 3/4 inch card across the scoreboard Score at 3/4, 5 3/8, 6 3/8 and 10 7/8 inches.
Turn to the 8 1/4 inch side across the scoreboard, score at 1 and 7 3/8 inches.
Next fold the 5 3/8 inch score line and fold it back towards the flap, do this for all 4 areas.
See below as the folded part folds on to the same side towards the same scored line.
You should have a little fold as shown below.
Down below is how all 4 areas should look. You can see video tutorial to follow along.
Next adhere down the flaps. Only the middle section, do not place adhesive past the first score line on the right or left side as this closure area and it will not close if adhered.
Next punch one of the top flaps with rounded corners. Only one side as that side will fit into the rectangular flap.
For the chipboard leaf vines I used a lt. green and dark green gelato to color them and inked a bit of the grape fruit around them. I added glossy accents to them, set aside to dry.
I did use the Bee Honey comb wreath using my gelatos to color around it and added glossy accents to them, set aside to dry.
Here I wanted share with you how the metal dies work. These are so neat as you can place a card that tucks underneath the border.
I adhered the pretty polka dot pattern paper with an area for my sentiment inside the card.
Look how wonderful these all turned out. I just love the card box holder. I like that this paper gives you space to stamp a sentiment on it. And I like how everything coordinates well together. One think I would like to say is to not add a lot of bulk to your cards as you will not be able to get many inside and the box may not close very tight.
I hope you enjoyed today's step by step tutorial, remember I have the video tutorial for your convenience. I had a great time using the Card, Tag and More Kit along with the Chipboard Bee Honey Comb Wreath and a few of the white flowers from the Scrapbook Kit.
For more details you can always view the video tutorial process, which is at the top of the page.
Thanks again for joining me, I have all the links listed for you throughout the post so just click on the words and you will be taken directly to the store.
Wishing you all a great day and Happy Crafting.


.png)

No comments:
Post a Comment