I hope you all are having a nice day today. Are you excited for these new kits for June 2024 I absolutely am loving the Mixed Media Kit and pairing it with the Scrapbook and Card Kit.
I have a great fun project for us today using all three of the June Kits together, of course you can always swap out items you have to create this fun project. Down below I have the video tutorial for your convenience and the step by step instruction as well.
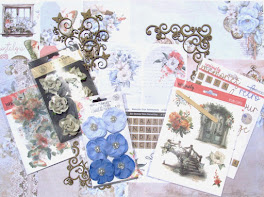
Here are the kits I used for my altered paintbrush.
To begin apply gesso to the front and back of your paintbrush from the top to the bottom of the bristles. You can use white, black or clear gesso. What ever type of look you are going for, let dry for a few minutes.
Next mix the textured powder with the liquid acrylic violet from the Mixed Media Kit together and a bit of water until you get the desired texture you want.
Next apply the acrylic texture to the chipboard butterfly swirl from the Scrapbook KitScrapbook Kit or to any chipboard embellishment you have in your stash.
Once your done set aside to dry.
Next place the stencil from the mixed media kit down on top of the paint brush and apply a coat of the modeling paste on top. Apply all the throughout the handle. Set aside to dry. You can use a heat tool but be careful as the heat will melt the modeling paste.
Once your paintbrush is dry you can start adding your paint to the brush. I just added a few droplets from the Ochre and Violet liquid acrylic to the bush, spritzed some water down and let the paint run down to the bristles. You can add as much as you'd like. I also used a napkin to dab some of the paint off here and there as I didn't want a very dark paint brush.
Here is where I am adding more violet to the paint brush and spritzing some water on and letting it run down the handle.
After your are done with adding the paint let dry for a bit. I but the chipboard butterfly swirls in half and adhered down with my adhesive. (art glitter glue) I cut up some small pieces of black chipboard from my stash adhered them in the middle of the handle right above the bottom chipboard butterfly. This so I can build up my window I fussy cut out from the pattern paper.
I fussy cut out this window from the Card, Tag and More Kit and placing it on top of the black chipboard pieces. This will raise the window to give it some lift and dimension.
Here are few photos of the finished altered paintbrush. I did use the purple flowers from the and the fussy cut the window from the Card Kit and the Chipboard Butterfly Swirls are from the Scrapbook KitScrapbook Kit. I also used some Glitzy Magical Gleaming Gold from a past Mixed Media Kit to make the chipboard a little light and not be so dark and plain.
I hope you enjoyed today's step by step tutorial. I had a great time using all three kits June 2024 Mixed Media Kit , June 2024 Card, Tag, and More Kit and June 2024 Scrapbooking Kit to create this lovely and fun Altered Paintbrush for you all. For more details you can always view the video tutorial process, which is at the top of the page.
Thanks again for joining me, I have all the links listed for you throughout the post so just click on the words and you will be taken directly to the store.
Wishing you all a great day and Happy Crafting.
Don’t forget to follow us on all our social media:


No comments:
Post a Comment