Hi everyone,
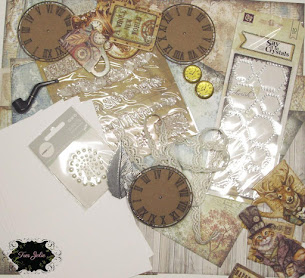
I hope you all had a wonderful Christmas with family and friends. Today I have another fun crafty project for you using the December Scrapbook Kit along with some items from the December Card, Tag, and More Kit. I have the links below for you for both kits. I also have a video tutorial for you as well as the step by step down below.
December Scrapbook Kit December Card, Tag, and More Kit
To start our Stationery Book, cut one piece of cardstock at 12 x 9 1/4 inches and one piece of cardstock at 4 x 9 1/4 inches.
Next place 1/2 inch tape on the right side edge of the paper.
Attach the 4 x 9 1/4 inch piece to the tape.
Next to create your spine fold your piece of paper in half and place the crease on the 6 inch spot of the scoreboard. Then score at 5 1/4 and 6 3/4 inches. Burnish down the score lines and you should a spine just like the photo below.
Now we are going to create a pocket to hold journals, cards, envelopes, large tags or notepads. Cut one piece of cardstock at 8 1/4 x 9 1/4 inches. With the 8 1/4 inch across the score board score 1 inch on the left side and right side. Turn the paper to the 9 1/4 inch side across the scoreboard and score at 3 and 4 inches.
On the left and right side where the you scored the at 3 and 4 inches are little squares cut a slit to the first score line as shown below. These are little tabs that will fold in to form our pocket.
Now burnish down all the score lines. Next fold the bottom up and adhere the small tabs into the long tabs. You should have a pocket just like the photo below. ***(You can also watch the video to get more details.)
Now you can use your pattern paper to cover the inside and the pocket we created. ***(You can also watch the video to get more details.)
Before covering the front and back of the Stationery Book adhere down some lace or ribbon for your closure.
Here is the book covered.
To create the pen holder cut a piece of cardstock at 3 1/2 x 5, Score at 1/2 inch and at 1 inch on the left and right side, turn to the 5 inch laying across the score board and score at 1/2 inch and 1 inch.
Next cut off the 3 corner squares and the cut a small slit up to the first score line in between the long tab and the small square tab. Burnish all the score lines and adhere the small tab inward to the long tabs and the small rectangle one on the bottom folds up. ***(You can also watch the video to get more details.)
Burnish all the score lines and adhere the small tab inward to the long tabs, then adhere the small rectangle one on the bottom folds up. ***(You can also watch the video to get more details.)
Next create two small pockets, these will go on the left side of the Stationery Book.
Cut two pieces of cardstock at 2 1/4 x 5, score 1/2 inch on left, right side turn and score 1/2 inch down. Burnish all the score lines down. And you can cover with pattern paper.
Here is how you lay down the pen holder and the two small pockets.
Here is what the left side looks like all finished.
Here is what the inside looks like when opened up
Inside I placed two cards which were from the Card Kit. I used the Scrapbook paper to decorate them.
I had a couple of small paper journals in my stash. I covered and decorated them.
Here is the finished front of the Stationery Book.
I hope you received some inspiration from this Stationery Book I created. I had fun creating this and you can definitely add on and use it to hold various items. This even good to give as a gift.
Thank you all for joining me today. For more details you can view the video tutorial.
Don't forget to post your project on our Facebook Group Page, link is down below.
For more details you can always view the video tutorial process, which is at the top of the page.
Thanks again for joining me, I have all the links listed for you throughout the post so just click on the words and you will be taken directly to the store.
Wishing you all a great day and Happy Crafting.


.png)
.png)
%20INSIDE%20OPENED.png)
.png)
.png)
FRONT.png)

No comments:
Post a Comment