Hi all,
I'm back today with another fun project using Chipboard Embellishments from Clear Scraps. Here are the two chipboard embellishment pieces we're gonna be decorating, the Gnome Chipboard Embellishment along with the Mason Jar Chipboard Embellishment.
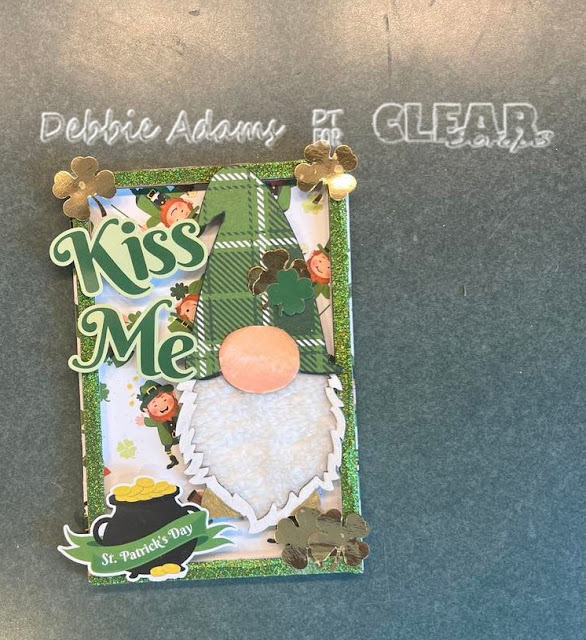
Here is the finished Chipboard Gnome Frame and Mason Jar, aren't they just cute. These will look so cute on the tiered tray I am going to decorate for St. Patrick's Day.
Let's get started. To start out color around the mason jar with a green marker and color the lid. For the lid of the mason jar I used a dark gray but came back later with a silver metallic marker,
Next take the full piece of the mason jar and cover with cardstock or pattern paper. For this I traced the mason jar on my paper then cut out and adhered. It doesn't have to go to the top of the mason jar as it will be covered with the frame piece.
Next I used green glitter to cover the frame portion of the chipboard mason jar. Next adhere some acetate to the back of the mason. For this part I adhered the acetate down to the back of the mason jar and cut around the mason jar.
*** Don't forget to adhere the acetate to the back of the mason jar before placing down the foam tape. Next I placed foam tape on the back of the frame of the mason jar and decorated the full chipboard piece that we covered with card stock. I love the rainbow with the pot of gold and the hat with shamrocks.
Add in your sequins or shaker bits and then cover with the frame piece we placed foam tape on .
Here is the finished Chipboard Mason Jar.
Since I am using this as a decoration item on the tiered tray I created a stand.
Use a chipboard piece measuring 1 1/2 x 5 1/2 inches, make tick marks on the bottom at 1 1/8, 2 3/8, and 4 3/8 inches this is where you are going to fold and crease your stand, as shown below. Adhere the last piece that you marked at 4 3/8 at the bottom of the mason jar and you will fold over the where creases are and the end piece with adhere to the back of the mason jar.
Here is a photo of adhering the last flap to the back of the mason jar.
Project 2 - Gnome Frame
To begin I used the frame which is the packaging that holds the chipboard gnome.
First I placed double back tape around the frame and covered with green glitter.
Next I cut a plain chipboard piece from my stash at 4x6. Covered with pattern paper.
Next add foam tape to the back of the glittered frame.
Place the frame on top of the covered 4x6 piece of chipboard.
For the gnome I traced his hat area onto a pattern paper and cut out and adhered onto the chipboard gnome. Next I created a little nose and colored with my markers, I painted the outline of his beard with white paint and then adhered a faux fur clothe behind for his beard. I did paint his shoes with a metallic gold marker.
For the stand in the back of the frame I used a piece of 2 x12 inch chipboard from my scraps but cut it down to 2x 7 inches.
Cut the chipboard strip down to 2 x 7 inches. Make tick marks at 1, 2, 3, and 6 inches.
Down below I used my ruler to help crease the chipboard where the tick marks are.
Adhere the 1 inch piece to the back of the frame first, fold over the last flap and adhere to back.
Here is what the stand looks like once its all adhered on.
Finished St. Patrick's Day Gnome Frame.
I hope you got some inspiration from today's St. Patrick's Day project. I really enjoyed creating these two little decoration pieces using the Chipboard Gnome Embellishment and the Chipboard Mason Jar Embellishment. I have the links throughout the post here just click on the product name and you will be directed to the store.
I wish you all a very Happy Crafty Day.


No comments:
Post a Comment