Hi everyone,
Debbie here today bringing you some fun fold cards you can create using the Heart Signs Chipboard from Clear Scraps.
Here are the finished cards we are going to create. I made one heart into a Birthday theme and the other a Valentine's theme. I hope you get some inspiration from both.
To start off you will need the supplies from Clear Scraps.
Card #1 Measurements for your card - Cut 1 piece of cardstock at 11x4 1/4 inches; Place the 11 inches across the top of your scoreboard score at 2 3/4, 5 , 6, 8 1/4 inches on your scoreboard.
The measurements for the card mats are down below.
I did layers for my matting on my card, but you can mat your card how ever you'd like. I adhered the mats to front and back of the card.
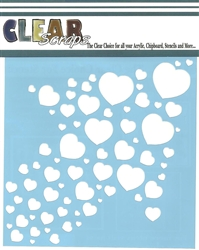
Next I cut to white pieces of cardstock measured 1 7/8 x 3 7/8 inches and stenciled the hearts from the Heart Arrow stencil from Clear Scraps.
Once I got the desired look I adhered to the two middle panels on in side of the card.
Next place adhesive on the chipboard heart, the one with out the banner in the middle and then sprinkle glitter on it as shown below.
I sprinkled red glitter on my heart.
Next adhere the heart to the middle 1 inch panel and decorate the inside.
For the closure you can create a bellow band, this will keep the card closed.
Here we go with Card #2
Cut your cardstock at 9 1/4 x 5 inches, score at 3 inches. This gives you a little flap in front of your card.
Next we are gonna use the frame from that was attached to the chipboard hearts. Use double back tape or you can use your glue to cover around the chipboard frame as shown below.
Next sprinkle with glitter.
Next I inked the inside and outside edges of the frame with black ink.
Adhere the frame onto pattern paper.
Turn the frame over and cover the right hand side back side of the frame with pattern paper.
Now we are going to color only the heart part of the chipboard heart with banner with a red marker. I used a red sharpie marker. Where the banner is going through the heart to not color.
Next to bring out the red a little more I used my red gelato colored over the red marker and smudged it in using a dry clothe.
The banner I painted in black gesso but you can use black paint.
I stamped and heat embossed Happy Birthday onto the banner.
Adhere the frame to the from flap of your card and adhere the heart to middle of the frame. I really like how this card and the chipboard heart sign turned out. Now you can add some glossy accents to the heart and let dry.
Here are both of the cards we finished using the Chipboard Heart Signs and 6' inch Heart Arrow Stencil.
I hope you liked this short tutorial and it gives you some inspiration on how to use the chipboard heart signs in different ways for your cards, layouts or any projects you are creating. For your convenience I have the links above and down below for the Heart Signs and the 6' Heart Arrow Stencil.
Thanks for being here today.
Have a great day and Happy Crafting.


No comments:
Post a Comment