Good Day Everybody,
It's Deb here back with some fun Valentine Card techniques that will get your crafty mojo going. I have the step by step tutorial down below for you. Let's get started.
Here's a photo of the finished cards. I really like how the backgrounds turned out using the paint and the Double Heart Chipboard Embellishment along with the 6" Heart Arrow Stencil. .png)
Here are the supplies we used to create these cards. I used the Double Heart Chipboard Embellishment along with the 6" Heart Arrow Stencil. (If you are interest in theses click the product name)
To begin we are creating 2 cards, cut a two piece of white cardstock as a size A2 card
4 1/4 x 5 1/2 inches.
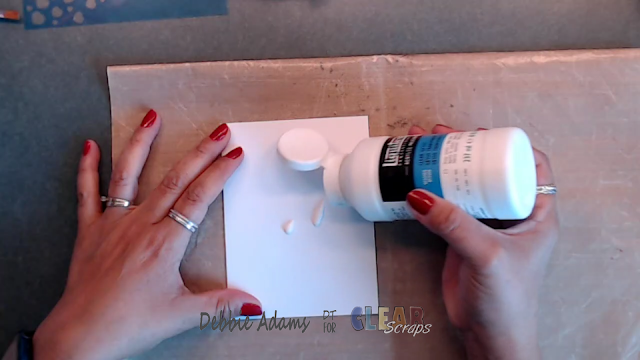
I am applying some clear gesso to the cardstock.
Brush gesso on both pieces of cardstock.
Next cut the double hearts out of the chipboard frame. We will be using both of these for our cards.
Next I painted the double hearts red let dry. Then add glue on top of the hearts to sprinkle some red glitter on them.
Next we are doing to place some versamarkon the frame. Make sure to get the versamark all over.
I then sprinkled some Range embossing powder using Princess Gold, covering the frame entirely.
Next use the heat gun to set your embossing powder.
Here is what the frame looks like once its finished.
Now that our white cardstock is dry grab your acrylic paints and place over your cards. This will get a little messy, if you would like you can always put on gloves.
Once I added my paint I then just used my fingers to swirl the paint around until I got the desired look I wanted.
Here is another technique you can which is smooshing. Place the paint on your mat and swirl the paint around.
take your cardstock and place in the paint.
Here is what it will look like once you lift your card up. I like the texture it gives the card. You can always add more white or what ever color you want.
Now I have two card bases. Now you can set aside to dry or use your heat gun.
Here I am using my heat gun to get the paint. When using the gun you might get cracks but its fine with me as I think it adds a little more to the texture of the card. If you don't want cracks let air dry over night.
Here is what the base panels look like once I'm done drying them.
I cut the two panels apart.
Next we are going to use one of the card panels with the Heart Arrow Stencil. So i grabbed some red paint and red glitter with some mixed media white paste and mixed everything together.
Next I tapped down the stencil on top of the card so I wouldn't have any movement. However, the card slipped a bit so I did have a few hearts that didn't turn out.
***Recommend - tape down the card first then tape down the stencil on top of the card so you don't have any slips from the card.
After I let the hearts dry a bit I layered it on my card base. Now we get to decorate.
Here is the finished card. I added some stickels around the hearts and a little stickels here and there around the card. I used some ephemera and did some fussy cutting from the paper collection I used, added a pink butterfly. I also heart embossed a sentiment in the left hand corner.
Now for the second card. I used the stencil just with some red ink. You will tape down the stencil the same way we did for the first card.
Next I adhered the heart stenciled panel to the back of the embossed chipboard frame and adhered to the base of the card. The card will measure 6 1/4 x 4 1/4 inches. Next I added some foam tape to the back of the double hearts and place in the center of the frame. Added a little stamped sentiment "With Love" along with some flowers and a little butterfly.
I hope you liked today's project. I really enjoyed playing around and using some fun techniques using paints with adding the stencil to both of these panels and the double heart chipboard piece is just beautiful. I hope you got some inspiration to create some lovely Valentine's Day cards. I have links here for you - Double Heart Chipboard Embellishment along with the 6" Heart Arrow Stencil.
Thanks for joining me and Happy Crafting.


No comments:
Post a Comment